Showing posts with label gifts. Show all posts

Monday, November 14, 2022

Star Map Wedding Gift Ideas

There's something so romantic about laying on a blanket, staring up at the sky, thinking about your hopes and dreams and happily ever after.

I don't know how often people really do that, to be perfectly honest with you, but it's so romantic if you do it.

We've done it, once upon a time, laying on the roof of Pete's car, in the middle of the highway, before the fourth of July fireworks.

Your wedding day is arguably the most romantic day of your life, but you don't have the time to look up at the sky and take that moment in. Instead, your busy dancing and not eating and chatting with relatives and taking photos. The sky just doesn't stand a chance.

Which is why Star Map Wedding Gifts are such a good idea. Your gift recipients can hang the star map in their bedroom and just stare at that sky, the one they got married under, and it's so sweet.


Star Map Wedding Gift Ideas

Affiliate links are included in this post and A Bride On A Budget may make a commission if you use them.

Personalized Star Map

A perfect idea would be a personalized star map, so let's start with that one. We got a pair for review from CANVASDISCOUNT.com and absolutely love them.

You input the location of the wedding, plus the date and time, and a map of that exact sky will populate.

You can choose to turn the constellations and grid on and off, which is easy to do with a simple toggle. So play around with that and see what design you like better.

The "simple" design has just the map in color and the rest of the print in white; the other version is the entire print in color. You can choose from nine different colors, so if you've seen your recipient's home, you can choose a color that fits with their décor.

If not, just go with whatever color you think is best (personally, I vote for midnight).

You can then add up to six lines of text at the bottom (that's not including the date and location). Type something romantic, then the names of the bride and groom.

You can choose your frame and you can add a hanger set (which helps hanging). And that's it. Really, all you have to do is make sure the date and location are right, choose the coloring, and Canvas Discount does the rest.

Ours arrived and I was blown away by the quality of it. I was so impressed. It's printed on a Forex photo board, which is basically a thin board made of PVC. It's lighter than traditional PVC, and gives a crisper print than traditional canvas prints. There's a whole different feel to a Forex photo board, which is really nice.

If you want to order one, use the code ABRIDEONABUDGET10 to save 10% off your total. The code is valid through the end of the year and can be used multiple times.

Purchase here

Star Map Notebook

We had a lot of trouble figuring out our guest book. I don't know why, but I just couldn't decide on what I wanted. I wish I had thought of a star map notebook.

This Star Map Notebook is so much fun. Since astronomers know the sky ahead of time, you can order star map wedding gifts ahead of time. This notebook has the star map, date, and a personalization on the front. It's then filled with a bunch of pages.

So, if you're the one getting married, you can order this for yourself. If you're a friend of someone getting married, definitely ask if they have a wedding guest book yet. If not, suggest this one. It's really sweet and would look cool on a coffee table.

Purchase here


Star Map Bracelet

If your gift recipient has too many wall hangings, but you still love the idea of a star map, check out this star map bracelet. It comes in five sizes, ranging from 5 to 9 inches, so you can pick a tighter or looser one depending on your recipient's style.

This would actually be a really cute gift for bridesmaids too. I always vote with giving jewelry as a bridesmaids gift, and a star map bracelet would be a really cute way for your bridesmaids to remember your wedding day. To an outside, the map would just look like a design. But to your bridesmaid, the map would be something super special.

Purchase here


Star Map Mug

This Star Map Mug is super fun. One side has the star map and the other side has the same "ink blot" like design, but instead of a star map, it's an image.

So, this is something you would have to get after the wedding because you'd probably want to add a wedding photo on the opposite side.

If not, you could use the day the couple got engaged and an engagement photo instead of the wedding date and a wedding photo if you were set on giving this gift on their wedding day.

Purchase here


Star Map Ornament

We get a new Christmas ornament every year that depicts something that we did during the year. If the couple you're shopping for is the same, this Star Map Ornament is perfect.

The sky on the ornament is actually the sky that the couple got married under. And the bottom half are snowy pine trees. So from afar, it just looks very Christmasy. But up close, it looks super sweet.

Purchase here

Which of these Star Map Wedding Gift Ideas is your favorite? Let us know in the comments.

Tuesday, June 1, 2021

DIY Bridesmaid Manicure Gift Bags

This DIY Bridesmaid Manicure Gift Bags posy is not sponsored.

I had a saying when it came to wedding stuff: If I can do it myself, I'm going to do it myself.

There were a lot of things on Pinterest that I fell in love with, but knew were made by a professional. Sure they're on Pinterest, but, as we've discussed before, not everything on Pinterest was done by the person who pinned it. So don't let it intimidate you. Don't feel like you have to DIY your entire wedding. That's ridiculous and time consuming and will make you absolutely hate the wedding planning process.

But the things you can do, absolutely do them yourself. Like these bridesmaid manicure gift bags that I put together in a grand total of 45 seconds.


These DIY Bridesmaid Manicure Gift Bags are a great alternative to going to the nail salon before your wedding.


DIY Bridesmaid Manicure Gift Bags


With the way the world is right now, these manicure gift bags are absolutely perfect for your bridesmaids. 

Many of your bridesmaids may not feel comfortable sitting in a nail salon, getting their nails done around a lot of people. And if they don't, you have to respect that.

Of course, these are things you have to think about when you're planning a wedding right now. Things you didn't have to think about way back in 2019.

So feel your bridesmaids out. And if they don't feel okay sitting indoors for an hour getting a mani/pedi, these bridesmaids manicure gift bags are perfect to gift them.

When you're shopping for the items for these gift bags, you could buy the color that you would like the girls to wear. That way, you know they'll all be matching on your wedding day, even if you're not all getting your nails done together.

When you're buying the lotion, organza bags, paper shred, and lotion, you can choose items that match the color family of the nail polish. That way, your entire gift is coordinated and looks like you spent a lot of time on it. More than that aforementioned 45 seconds.


These DIY Bridesmaid Manicure Gift Bags are a great alternative to going to the nail salon before your wedding.

DIY Bridesmaid Manicure Gift Bags Supplies:


How To Make DIY Bridesmaid Manicure Gift Bags:


These DIY Bridesmaid Manicure Gift Bags are a great alternative to going to the nail salon before your wedding.

Put a handful of paper shred in the bottom of the organza bag.

Here's my secret about paper shred. It always makes a gift look professionally made. I don't know why, but it gives off that illusion.

And anything that you handmake, you want it to look professionally made. It's 100% okay to DIY parts of your wedding. I did it. And heck, I have an entire blog basically dedicated to it.

But, it's not okay to make your wedding look handmade. You want to make things, but give people the impression that you bought said things.

Paper shred, as opposed to tissue paper, absolutely helps with that impression. 

These DIY Bridesmaid Manicure Gift Bags are a great alternative to going to the nail salon before your wedding.

Fill the bag with the nail file, nail polish remover, lotion, cotton balls, and nail polishes.

You want to layer the bag so the tallest item (in our case, the nail polish remover) is in the back and the shortest items (in our case, the nail polishes) are in the front.

These DIY Bridesmaid Manicure Gift Bags are a great alternative to going to the nail salon before your wedding.

Pull the strings of the organza bag to close it.

These DIY Bridesmaid Manicure Gift Bags are a great alternative to going to the nail salon before your wedding.

Cut a tag shape from a piece of white card stock.

Use the marker to write "mani thanks" on the tag and tape it to the front of the bag.

That's it. 

It's crazy how simple this is. You really could go crazy and design personalized labels for the lotion and nail polish remover, but I don't really recommend it. The point of this is that it looks awesome and is quick and easy. Anything you do to complicate it will take away from it being quick and easy. And then you might not actually want to make these for your bridesmaids.

Manicure bag.

What else can you add to these bridal party Manicure Gift Bags?


If you want to fill these up even more, you could add toe separators, although personally I don't like those, so I didn't add those to my gift bags.

You could also add a nail buffer, if you think your bridesmaids would use one of those.

You could also add this Nails B4 Males manicure toolkit. It comes with nail clippers, cuticle nippers, tweezers, a cuticle pusher/cleaner, and a glass nail file. Skip the separate nail file we mentioned above, and just add this cute vegan pouch in the bag instead.

Should a bride pay for her bridesmaids' manicures?


While we're on the topic of wedding manicures, let's talk about wedding etiquette. A bride should absolutely buy her bridesmaids a wedding thank you gift. But that gift doesn't have to be wedding nails, and it generally isn't.

If a bride invites all her bridesmaids to get their nails done together at a certain time at a certain salon, and the bride is choosing the color, then she should pay for the manicures. But, if each bridesmaid is going to get her nails done on her own, the bridesmaid should pay for her own nails. The bride shouldn't feel the need to Venmo her bridesmaids the cost of their mani/pedi.

For my wedding, none of my bridesmaids were able to come with me to get my nails done, except my maid of honor. So she and I had a solid 90 minutes or so of time alone, just us, to be pampered, the day before my rehearsal dinner.

That night, we were actually having a full barbecue at the hotel we blocked for our wedding guests, so it was nice to get our nails done before that pre-wedding party and for the rehearsal dinner the next day (and the wedding, of course).

My maid of honor was really sweet. Since it was just the two of us, she treated me to my mani/pedi (and actually to my eyebrow waxing too, since I did it at the same time). That was really sweet of her and very unexpected.
So if you're a maid of honor, think of budgeting for this surprise for the bride, if you can afford it.

BRIDAL BABBLE: What else would you add to these DIY bridesmaid manicure gift bags if you were making them?

Monday, November 4, 2019

DIY I Love You Because Dry Erase Frame

Update: You can get a free 8x10 at Walgreens now with the code EIGHT19. Use it to print out our DIY I Love You Because ... Free Printable. It'll make the perfect last minute Valentine's Day gift.

I love things that are cute. They just get me. Anything cute, sentimental, that sort of thing, is just perfect. It works as home decor and as a wedding gift (depending on what side of the wedding invitation you're on).

So when my friend suggested the idea of an I Love You Because dry erase frame, I had to jump at putting one together.


DIY I Love You Because Dry Erase Frame


Want a fun gift idea for your significant other or a friend who is getting married? Check out this DIY I Love You Because ... Dry Erase Frame from www.abrideonabudget.com. You can get the printable for free in the post too.

This frame is super easy to put together, plus a great way to share love notes with you and your honey.

Want a fun gift idea for your significant other or a friend who is getting married? Check out this DIY I Love You Because ... Dry Erase Frame from www.abrideonabudget.com. You can get the printable for free in the post too.

What You'll Need:

What You'll Do:

Save our I Love You Because printable from the end of the post. Upload it and have it printed.

I would suggest printing it at a local Walgreens instead of at home because it will be better quality there (plus, it will be an ink hog at home).

Want a fun gift idea for your significant other or a friend who is getting married? Check out this DIY I Love You Because ... Dry Erase Frame from www.abrideonabudget.com. You can get the printable for free in the post too.

Put the photo in the frame.

Every day, use the dry erase market to write a new reason why you love your man or lady.

Don't forget to keep an eraser handy so you can change it.

Now, about that printable ...

Want a fun gift idea for your significant other or a friend who is getting married? Check out this DIY I Love You Because ... Dry Erase Frame from www.abrideonabudget.com. You can get the printable for free in the post too.

To save it, just right click and choose where you want to save it on your computer.

When you're ready, upload it and print it.

BRIDAL BABBLE: If you were making this I Love You Because dry erase frame today, what would you write on it?

Love dry erase frame?


Monday, June 17, 2019

DIY Wedding Flowers Shadowbox

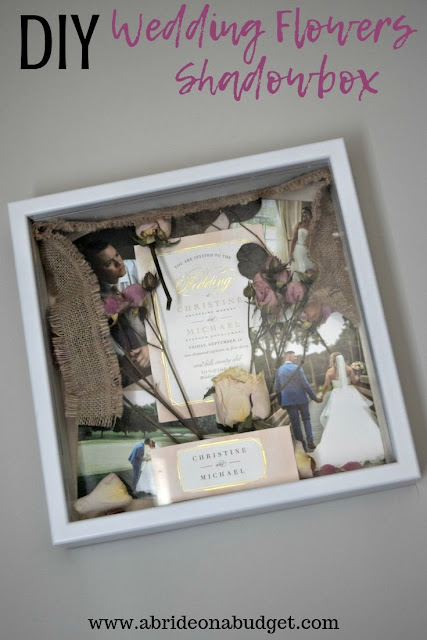
The day after my brother and his wife got married, they were heading off on a Mediterranean cruise. As we were saying our goodbyes in the hotel, my brother's wife handed her bouquet to my mom in case we were able to do something with the flowers. And, if not, no worries, she said. I immediately thought about a DIY Wedding Flowers Shadowbox.

See, when we got married, I preserved my flowers using silica gel. Well, not exactly my flowers.

We stayed the night at the hotel where our reception was, and when we got home, I realized that I left my bouquet in the room. We called immediately upon noticing, but they were gone. It broke my heart because I wanted to save them. So Pete actually called our florist and had them recreate and then deliver my wedding bouquet. And I was able to preserve those and use them in the projects I had intended.

I didn't want to make my brother's wife the same exact thing I made for myself, so I decided to use a few of their wedding items to create a full wedding shadowbox. It came out even better than I could have imagined.

Preserve your wedding items with a beautiful DIY Wedding Flowers Shadowbox. Get the tutorial to make one on www.abrideonabudget.com.

DIY Wedding Flowers Shadowbox


What You'll Need:


What You'll Do:

As soon as possible, put the entire bouquet in a large plastic bag and tie it shut. I would recommend a small garbage bag with a knot tied at the top. You want to keep out as much air as possible so the flowers don't start oxidizing and discolor I got.
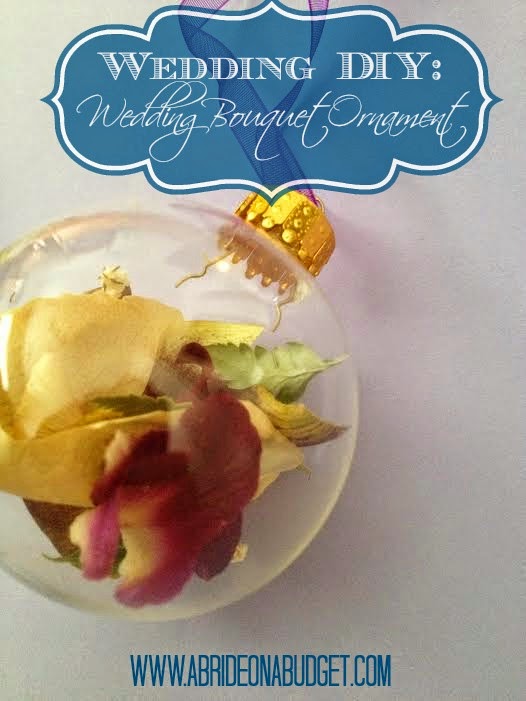
Then, keep the bag in the fridge until you've purchased your silica gel and container. That will also delay the discoloration of the petals. You can, honestly, keep it that way for a month, but the sooner you make it, the better.

This is a two part process. The first involves preserving the flowers in silica gel, which takes two weeks. The second is the assembly of the wedding flowers shadowbox. So, keep in mind that if you do want to make this for yourself or offer to make this for someone, it's not a project that will be completed quickly.

To Preserve The Flowers:

Take the bouquet from the fridge and remove it from the bag.

Carefully, unwrap any ribbon or burlap from the handle. It may be attached by pins, so look out for those. Don't throw these away. You'll use these to decorate the shadowbox later.

Very gently separate the flowers and any baby's breath or greenery. The petals are so delicate and may start falling off if you're too rough.

Preserve your wedding items with a beautiful DIY Wedding Flowers Shadowbox. Get the tutorial to make one on www.abrideonabudget.com.

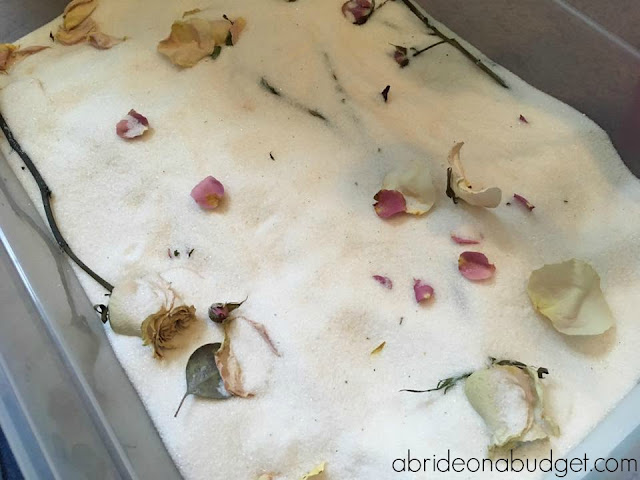
Fill the bottom of an airtight container with a layer of silica gel.

Place in a layer of flowers, baby's breath, and greenery on the silica gel. Cover that completely with another layer of silica gel. Add another layer of flowers and greenery, then another layer of silica gel.

Preserve your wedding items with a beautiful DIY Wedding Flowers Shadowbox. Get the tutorial to make one on www.abrideonabudget.com.

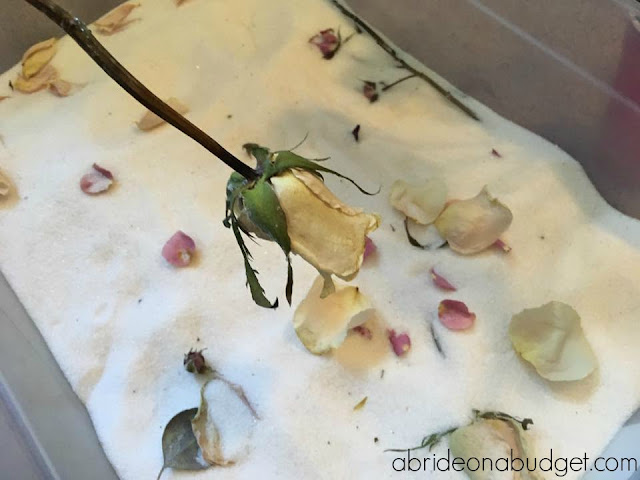
If you're preserving flowers like roses, you'll want to pour some the silica gel directly into the top of the flower before (gently) placing it in the box. This will help it hold its shape better and will preserve the inner petals as well.

Leave the box in a dry spot for two weeks.

After they've sat, carefully remove the flowers from the silica gel being sure to discard any silica gel that is between the petals. You can pour the silica gel from the box into a large airtight, zip-top plastic bag and reuse it. I've used mine a few times in the last five years.

Preserve your wedding items with a beautiful DIY Wedding Flowers Shadowbox. Get the tutorial to make one on www.abrideonabudget.com.

Individually spray each flower and piece of greenery with a layer of triple thick clear glaze. One layer is enough, but be sure to get both sides (and the inside of the flowers). Store them upright until they've dried. Overnight is best.

To Make The Wedding Shadowbox:

Preserve your wedding items with a beautiful DIY Wedding Flowers Shadowbox. Get the tutorial to make one on www.abrideonabudget.com.

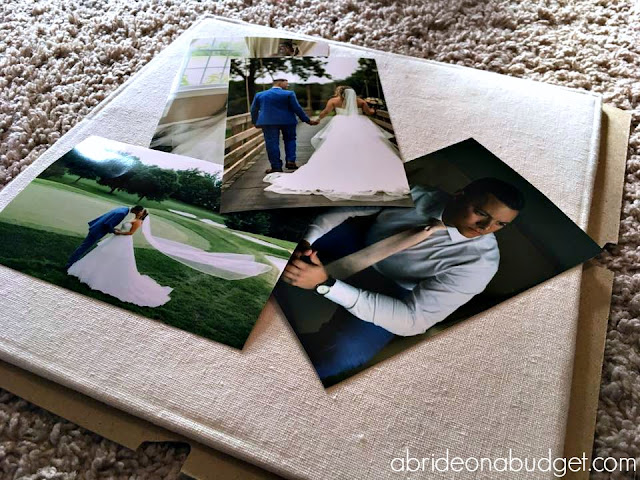
In the two weeks you're waiting for your flowers, print a couple of wedding photos from the couple and accumulate any wedding accessories you can: the invitation, the save the date, wine corks, escort card holders, etc. Of course, some of that takes pre-planning.

Preserve your wedding items with a beautiful DIY Wedding Flowers Shadowbox. Get the tutorial to make one on www.abrideonabudget.com.

Take out the backside of the shadowbox and arrange your photos, accessories (including the burlap and ribbon), flowers, and greenery.

Preserve your wedding items with a beautiful DIY Wedding Flowers Shadowbox. Get the tutorial to make one on www.abrideonabudget.com.

Once you have everything arranged, you'll be able to decide if you need to trim the stems off the flowers and greenery or the burlap/ribbon.

Try to keep things like the invitation or save the date as is.

Preserve your wedding items with a beautiful DIY Wedding Flowers Shadowbox. Get the tutorial to make one on www.abrideonabudget.com.

Once you have everything as you want it, use the double-sided tape to hold down the burlap or ribbon. Then, if you have something like an invitation wrap, affix that to the front of the box.

Preserve your wedding items with a beautiful DIY Wedding Flowers Shadowbox. Get the tutorial to make one on www.abrideonabudget.com.

Add a few petals on the bottom of the box to add a little depth.

Preserve your wedding items with a beautiful DIY Wedding Flowers Shadowbox. Get the tutorial to make one on www.abrideonabudget.com.


Use the pins to affix everything else down. For the flowers, try to put two pins per (short) stem, then another two in the flower itself. You can glue everything down if you prefer, but I prefer the airy feeling the pins provide.

Preserve your wedding items with a beautiful DIY Wedding Flowers Shadowbox. Get the tutorial to make one on www.abrideonabudget.com.

Put the back on the shadowbox and double check to make sure nothing moved before you close it.

Hang it on the wall.

Preserve your wedding items with a beautiful DIY Wedding Flowers Shadowbox. Get the tutorial to make one on www.abrideonabudget.com.

BRIDAL BABBLE: What would you add to this DIY Wedding Flowers Shadowbox?

Want other ideas for your wedding flowers?


Friday, November 30, 2018

Five Fun Shirts For The Wife-To-Be

A Bride On A Budget received one of these Fun Shirts For The Wife-To-Be items for review.

Getting married is fun. You get engaged, which is always a fun story to tell. Then you plan the wedding, which is one of the hardest and stressful, but most rewarding, tasks you'll endure in your life.

And then you're married.

And what people lose sight of is the actual marriage. Yes, you should plan a wedding, but you need to plan for your marriage. You need to remember that the reception is a party but the commitment you make is important. Really important.

That part is fun too. Trust me. It's nice to have a husband and to be someone's wife. That's what the engagement and wedding lead to. So instead of filling your closet with items that say bride and bride-to-be, fill it with a word that's less fleeting: wife. If you're a wife -- or a bridesmaid of a wife-to-be -- you'll love this. I picked out five really fun shirts for the wife-to-be.

And, just an idea: Any of these would be super fun to pack and bring on the honeymoon!

Need a gift idea for a bride? Pick her up one of these fun shirts for the wife-to-be that www.abrideonabudget.com wrote about. It'll get more use than a "bride" top.

Five Fun Shirts For The Wife-To-Be

  1. Happy Wife Happy Life Tee
  2. The Mrs. Tank Top
  3. Trophy Wife T-Shirt
  4. Married AF Tank Top
  5. Off-Shoulder Wifey Tee
Need a gift idea for a bride? Pick her up one of these fun shirts for the wife-to-be that www.abrideonabudget.com wrote about. It'll get more use than a "bride" top.
Happy Wife Happy Life Tee
Pete and I joke about the "Happy wife happy life" rhyme, but it's true. It's also true that if you have a happy husband you have a happy life, but that doesn't flow as well.

I would actually pick this Happy Wife Happy Life tee up as a joke, but there is more truth in it than a wife-to-be might realize. I also saw a version of it for men, and that's actually really funny.

Purchase here.


Need a gift idea for a bride? Pick her up one of these fun shirts for the wife-to-be that www.abrideonabudget.com wrote about. It'll get more use than a "bride" top.
The Mrs. Tank Top

I love this The Mrs. Tank Top. The font is beautiful, and I'm a huge fan of razorback tank tops. If you're not, though, you can get it in t-shirt form too.

You can get this top in 13 different colors, so I would suggest buying it in your wedding color. That way, you can wear it in the future, but still be reminded of your wedding.

Purchase here.
Need a gift idea for a bride? Pick her up one of these fun shirts for the wife-to-be that www.abrideonabudget.com wrote about. It'll get more use than a "bride" top.
Trophy Wife T-Shirt
I'm laughing so hard at this Trophy Wife t-shirt that it would be doing this post a disservice to not include it. And hey, maybe your friend is a trophy wife. Nothing wrong with that.

The term started with bad connotations, and they might still linger, but there's nothing bad about your husband treating you right and being proud to have you around -- and that's what I think part of a trophy wife is (a modern one, anyway).

Purchase here.

Need a gift idea for a bride? Pick her up one of these fun shirts for the wife-to-be that www.abrideonabudget.com wrote about. It'll get more use than a "bride" top.
Married AF Tank Top
I really don't curse hardly ever, but I do text AF every now and again. Sometimes, it just fits. And it fits on this Married AF Tank Top.

It's definitely for someone who is a little more relaxed. And, honestly, don't we all need to be a little more relaxed in life. No one needs to be so serious all the time.

Purchase here.

Need a gift idea for a bride? Pick her up one of these fun shirts for the wife-to-be that www.abrideonabudget.com wrote about. It'll get more use than a "bride" top.
Off-Shoulder Wifey Tee
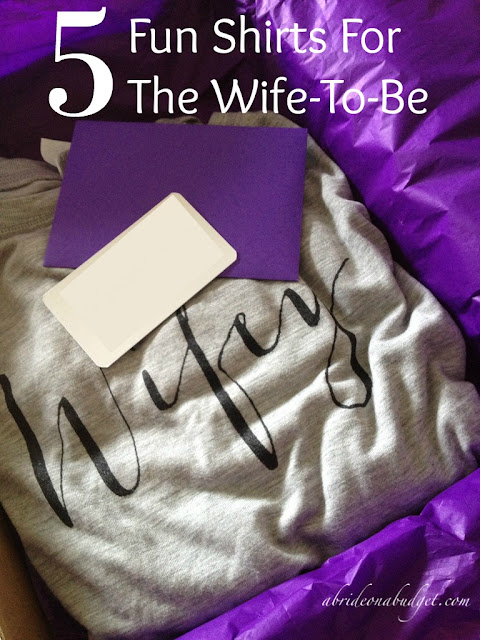
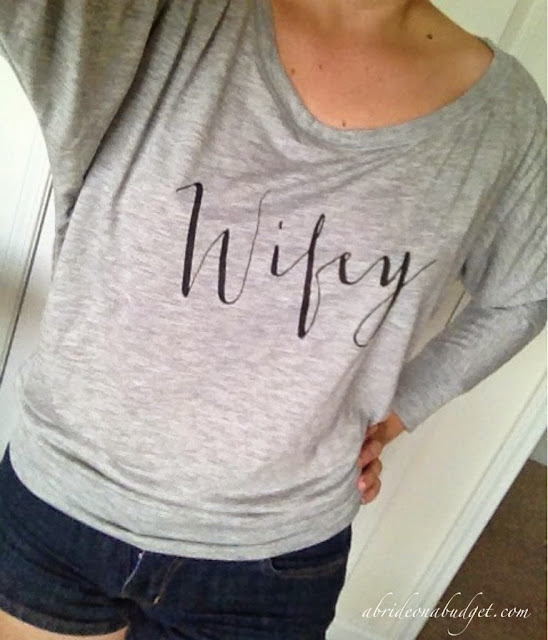
I got a chance to check out the Off-Shoulder Wifey tee from Fox Blossom. I'm in love with it. The letters are screen printed on some of the softest and most comfortable fabric I've ever worn. And, honestly, that's how marriage is. It's really comfortable. 

That's how it should be. It's work (just like Ben Affleck said in that speech when he won some award for Argo that may or may not have actually cost him is marriage ... ), but it's also comfortable.

Purchase here.

I love personalized wedding items. They're really cute and great for photos. But they can end up being one-time use items (I have a bridesmaid robe that has been stuck in my closet since my cousin's wedding day). Something like a Wifey tee, it's a one-lifetime use item. And that's a lot more than once.

BRIDAL BABBLE: Which of these shirts for the wife-to-be would you buy?

Monday, November 19, 2018

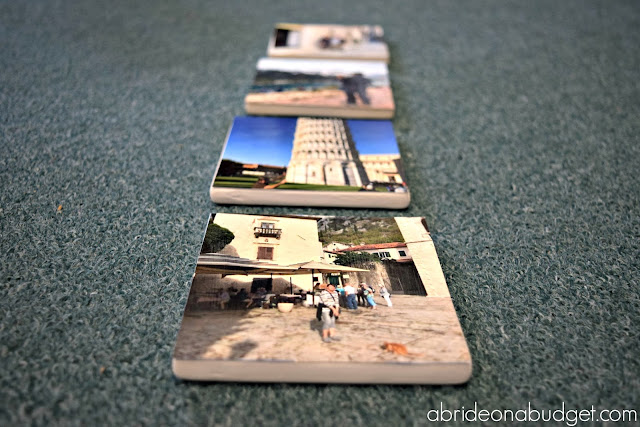
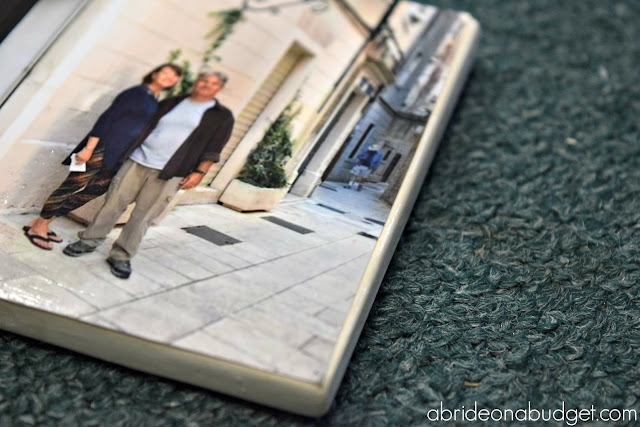
DIY Instagram Coasters (made from your honeymoon photos)

I love Instagram. It's a really fun way to keep up with friends and family at a glance. It's also a great place to store your photos, including some of your favorite honeymoon photos. But, they kind of just live on Instagram. What else can do you with them? Make DIY Instagram Coasters.

If you want something to do with your Instagram photos, you can make these DIY Instagram Coasters. They're a great way to share your honeymoon photos as well. Plus, they're a great gift idea. Find out how to make them at www.abrideonabudget.com.

DIY Instagram Coasters (made from your honeymoon photos)


I actually really like this idea as a sneaky gift too. You can scroll through one of your friend's Instagram photos, screen shot your favorite (since Instagram won't let you save someone else's photos), and give them something really special.

Plus, Christmas is coming up. And I'm not saying I made two sets of these for Christmas or anything, and I'm also not saying that these will look familiar in someone's stocking, but you can tell that's not me and Pete in the photos.

If you want something to do with your Instagram photos, you can make these DIY Instagram Coasters. They're a great way to share your honeymoon photos as well. Plus, they're a great gift idea. Find out how to make them at www.abrideonabudget.com.

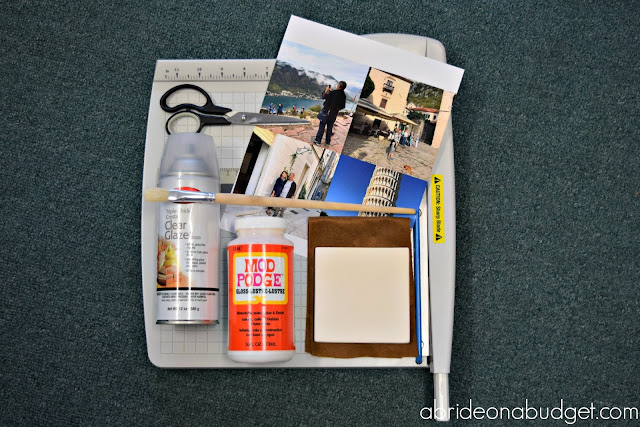
What You'll Need:


What You'll Do:

First, you'll need to make the 8x10 photo print. I actually made mine when there was a free 8x10 offer.

You can make these DIY custom coasters using any set of photos you want, but I like the idea of making them from honeymoon photos. It just seems like a nice gift -- plus, honeymoons are usually to exotic locations, so the coasters will look amazing just because of that.

The quick DIY of that. Screen shot four Instagram photos that you want to use for these Instagram coasters. Crop the images so they are square, then send them to your desktop.

Head over to Canva.com and create a project thats 1600x2000 pixels (make sure the size you create is an 8:10 ratio. I think 1600x2000 prints better than 800x1000).

Upload your images and add them into your Canva project. Stretch or squeeze them until they are 800x800 (if you used a 1600x2000 size. If not, just make sure they go to the edge and are a 4:4 ratio).

Order the image.

If you want something to do with your Instagram photos, you can make these DIY Instagram Coasters. They're a great way to share your honeymoon photos as well. Plus, they're a great gift idea. Find out how to make them at www.abrideonabudget.com.

When it arrives, cut the four images using a paper trimmer. You want them to be just a little bit smaller than 4x4, so that part of the top of the coaster makes a boarder around your image. You'll be able to assure they stick down and stay down that way.

If you want something to do with your Instagram photos, you can make these DIY Instagram Coasters. They're a great way to share your honeymoon photos as well. Plus, they're a great gift idea. Find out how to make them at www.abrideonabudget.com.

Paint a thin (but generous) layer of Mod Podge on top of the coaster.

If you want something to do with your Instagram photos, you can make these DIY Instagram Coasters. They're a great way to share your honeymoon photos as well. Plus, they're a great gift idea. Find out how to make them at www.abrideonabudget.com.

Immediately lay your image down on top of it.

If you want something to do with your Instagram photos, you can make these DIY Instagram Coasters. They're a great way to share your honeymoon photos as well. Plus, they're a great gift idea. Find out how to make them at www.abrideonabudget.com.

Paint a layer of Mod Podge on top of the image. Try not to let it get bubbly, but don't worry about it being cloudy. It will dry clear.

If you want something to do with your Instagram photos, you can make these DIY Instagram Coasters. They're a great way to share your honeymoon photos as well. Plus, they're a great gift idea. Find out how to make them at www.abrideonabudget.com.

Let it dry 15 to 20 minutes, then paint another coat. Let that one dry 15 to 20 minutes and add a third and final layer.

If you want something to do with your Instagram photos, you can make these DIY Instagram Coasters. They're a great way to share your honeymoon photos as well. Plus, they're a great gift idea. Find out how to make them at www.abrideonabudget.com.

While those are drying, cut small circles from the felt. When the third Mod Podge layer is dry, glue the felt bottoms to the coasters with the Mod Podge (or you can use regular glue here).

If you want something to do with your Instagram photos, you can make these DIY Instagram Coasters. They're a great way to share your honeymoon photos as well. Plus, they're a great gift idea. Find out how to make them at www.abrideonabudget.com.

Bring them outside and spray all the coasters with the Triple Glaze Spray. Let them dry outdoors for 24 hours before even thinking about them again.

Tie them up in twine or ribbon and they're ready to go.

Now, small aside: A bit over a year ago, I spent the afternoon upcycling a table by spray painting it and Mod Podge-ing a photo on top of it. I liked it initially, but the photo kept pulling up at the edges and ended up getting bent. We still use the table in our living room, but it does look crummy and unprofessional.

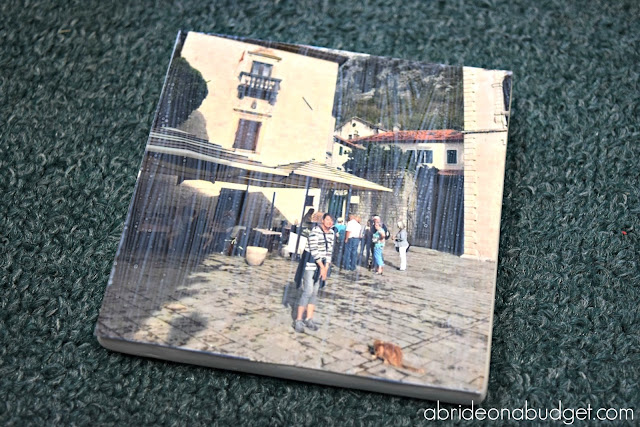
That's what will happen to your photo coasters if you make the photo go all the way to the edge. The ends won't have anything to grip on to, the Mod Podge will have nothing to affix down (so you'll essentially just be layering it on the photo to make it shine, not for any actual purpose), and your coasters will fall apart eventually.

Because even if they appear fine at first, the edge will always stick up. And it'll get caught on something (someone's hand, the corner of the table, whatever) and they'll pull up. And that will ruin them.

If you want something to do with your Instagram photos, you can make these DIY Instagram Coasters. They're a great way to share your honeymoon photos as well. Plus, they're a great gift idea. Find out how to make them at www.abrideonabudget.com.

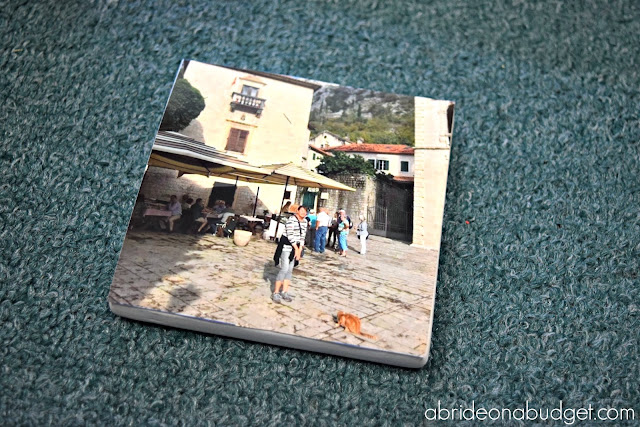
If you leave just a little bit of an edge, the photo will stick to the coaster, the Mod Podge will affix it down, and the glaze will reinforce that bond. These will look professional and not like DIY Instagram Coasters. And honestly, I always think if you are going to DIY something, you don't want it to look like you DIY'd it. You want it to look like you purchased them.

BRIDAL BABBLE: What photos would you use to make these DIY Instagram Coasters?

Want more homemade coaster ideas?

DIY Coaster Set Bridal Shower Gift
Need a gift for a wishing well? Check out this DIY Coaster Set Bridal Shower Gift from www.abrideonabudget.com.

Wednesday, October 17, 2018

Personalized Wine Decanter Groomsmen Gift Idea

This Personalized Wine Decanter Groomsmen Gift Idea post was sponsored by GroomsShop.

Your groomsmen are so important to your big day. They're the ones who are going to stand next to you while you make the biggest change of your life.

Of course, you're going to want to thank them. A handshake is nice, a pair of socks is practical ... a personalized wine decanter is our choice right now.

A great adult-friendly groomsmen gift idea is this personalized wine decanter. Find out all about it on www.abrideonabudget.com.


Personalized Wine Decanter Groomsmen Gift Idea


Let's talk wine for a minute. It's very fancy. It's not hoity toity or inaccessible, but it is a bit of a step up from doing shots all night long.

And so, when you and your friends were in college, there's a good chance you had a shot glass collection on display. But, honestly, the adult version of that is a wine decanter.

Hear me out.

A great adult-friendly groomsmen gift idea is this personalized wine decanter. Find out all about it on www.abrideonabudget.com.

A wine decanter sits out at all times, filled with wine. The decanter introduces oxygen to your red wine, and that adds flavors and aromas. It takes a couple hours, so what you traditionally do is slowly pour the wine into the decanter and then leave it out.

We actually have one (that we got as a registry reward) and it is on our kitchen table at all time -- even when it doesn't have wine it is. It's just pretty to look at and adds a little bit of class to our table.

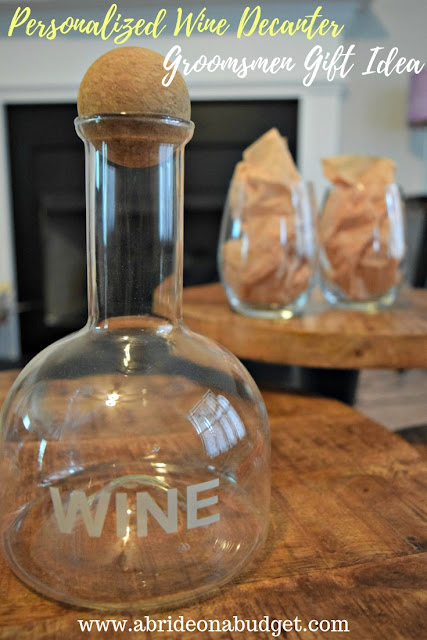
It's not as beautiful, though, as the personalized wine decanter I found at GroomsShop.com. The name is a little bit of a misnomer. The decanter itself isn't personalized. It's etched with the word "WINE" across the front.

A great adult-friendly groomsmen gift idea is this personalized wine decanter. Find out all about it on www.abrideonabudget.com.

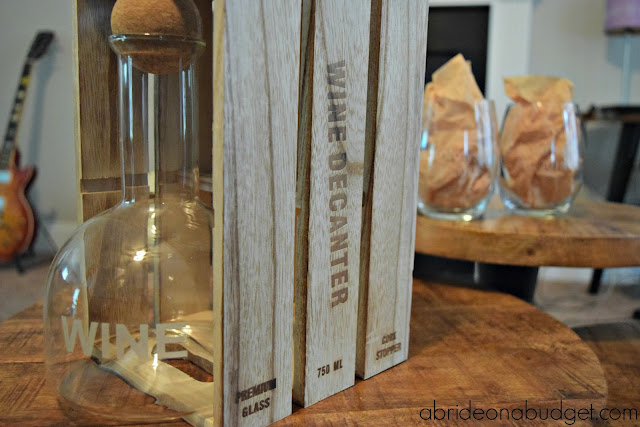
The decanter holds 750mL, which is a full wine bottle. But the stopper is the standout of this. It's a cork ball that just sits atop the decanter. It's so pretty and modern ... and makes for a beautiful table decoration.

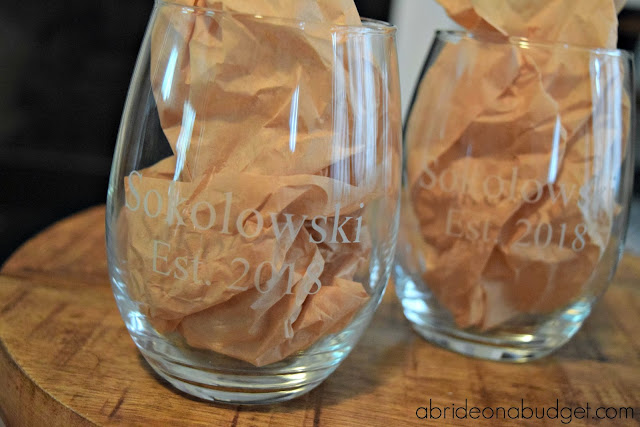
It also comes with a pair of stemless wine glasses and those can be personalized with either two lines of text, a single initial, or three ways to display an initial and name.

So, you have a couple options with these.

A great adult-friendly groomsmen gift idea is this personalized wine decanter. Find out all about it on www.abrideonabudget.com.

For the most part, if you're giving your groomsman two wine glasses, he won't be drinking alone. So putting just his name on it doesn't seems like the best idea. Instead, what I would suggest (if he's married already), would be to write his last name and Est. with the year of his wedding under it. That makes it really special for him -- and for his wife. Because, as you will learn during and after wedding planning, happy wife, happy life.

A great adult-friendly groomsmen gift idea is this personalized wine decanter. Find out all about it on www.abrideonabudget.com.

The set comes in a gorgeous wooden display box. I personally wouldn't keep it out on the table like that, but it does dress it up when you're giving it to your groomsmen. And that really helps. It's all about presentation.

I've actually never seen this anywhere before -- which shocked me, to be honest, because I spend a lot of time looking at wedding and bridal party gifts. I'm always trying to find something unique, so I am really happy about this.

If you're planning on buying this, now is the time to do it. Enter your email address in the pop up on GroomsShop.com for $5 off your order.

BRIDAL BABBLE: What would you engrave on this Personalized Wine Decanter Groomsmen Gift Idea?