Showing posts with label centerpieces. Show all posts

Wednesday, November 14, 2018

Simple Rustic Floral Wedding Centerpieces

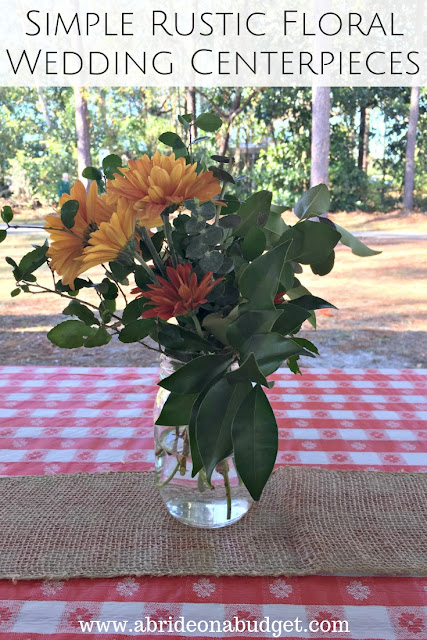
To be honest, people sometimes overthink their weddings. Yes, you want it to be beautiful and perfect. But that doesn't mean you can't have simple decor. It doesn't have to be over the top with doves flying around. Sometimes, best is something like theses Simple Rustic Floral Wedding Centerpieces.

Don't overthink your outdoor wedding. Go easy with these Simple Rustic Floral Wedding Centerpieces from www.abrideonabudget.com.

They were the centerpieces at a festival we were at recently, and I thought they would be perfect for a rustic wedding.

The festival was at a park, and we actually had our rehearsal dinner at a park, so a park is super special wedding location (to me anyway).

For a park, you want some nice decor but also stuff that can hold up to the outdoor elements. Wind, rain, sun ... it all needs to be taken into account when you're planning your decor.

That's why these centerpieces are great. They're inexpensive and work well for the outdoors.

Don't overthink your outdoor wedding. Go easy with these Simple Rustic Floral Wedding Centerpieces from www.abrideonabudget.com.

Simple Rustic Floral Wedding Centerpieces


What You'll Need:
What You'll Do:

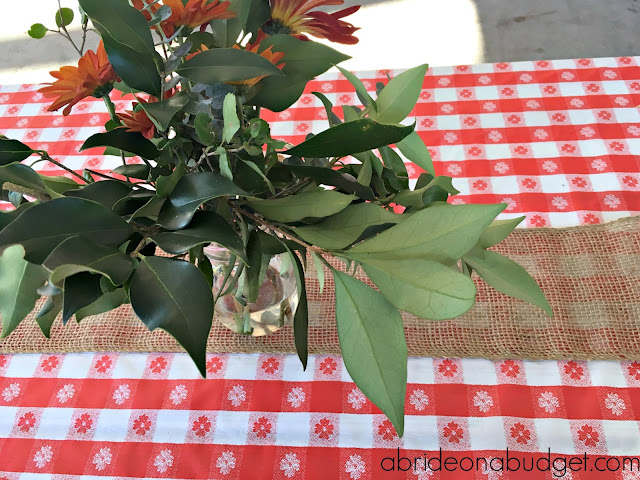
Lay the gingham tablecloth out on the table.

Measure the burlap table runner the length of the table, plus a bit of overhang on both sides, and cut it.

Fill the flower vase with water, then add the bouquet.

That's it.

If gingham is a little too picnic-y for your style, you can choose a solid color tablecloth instead. I highly suggest you sticking with vinyl or plastic disposable ones, though, so you can just toss them after the reception. 

BRIDAL BABBLE: What color tablecloth would you use for these Simple Rustic Floral Wedding Centerpieces?

Monday, October 8, 2018

DIY Pine Cones And Pumpkins Fall Wedding Centerpieces

I often say "Don't DIY everything for your wedding." You just can't. Time wise, it's kind of difficult. But skill wise, it's kind of impossible. If I'm being completely honest, not everyone has the vision and skill to DIY some wedding projects. So that's when a beautiful DIY crosses my eye -- like these gorgeous DIY Pine Cones and Pumpkins Fall Wedding Centerpieces that Brittany made -- my heart skips a beat.

Her centerpieces are incredible. And gorgeous. And festive. Did I mention they're incredible?
When I saw them, I flipped out. They're basically perfect. She added a silver crinkle wire bell and that takes them up a notch and that little extra touch is exactly what you need when you DIY something. See, the secret when you're DIY'ing wedding items is that you don't want them to look like you made it yourself. You want to make it yourself, of course, but you want your guests to think you paid a professional.

That illusion is key.

If you're planning a fall wedding, you need to make these DIY Pine Cones And Pumpkins Fall Wedding Centerpieces. Find out how on www.abrideonabudget.com.

DIY Pine Cones And Pumpkins Fall Wedding Centerpieces


What You'll Need:


What You'll Do:

If you're planning a fall wedding, you need to make these DIY Pine Cones And Pumpkins Fall Wedding Centerpieces. Find out how on www.abrideonabudget.com.

If you're getting your pine cones from outside (as you should because don't pay for nature), you need to prepare them for crafting first. We actually wrote a full post about how to prepare your pine cones for crafting.

Gently place the leaves against the side of the vase, then fill with pine cones, pumpkins, and silver balls.

Work in small batches because you don't want the leaves to fall into the center of the vase. You'll never see them and that will waste them.

You also don't want to just dump everything in because then you won't be able to see it all and it will look like a mess.

If you have table number flags, you can stick them in the top.

And, if you want to jazz them up a little, put square mirrors under them. The variety of geometric shapes will play on your guests' eyes.

Brittany has a few pumpkins to place around these, including one which will have the table number on them. She told me they're boxed up for her wedding this weekend (Ahh! It's her wedding week! So exciting!), so maybe she'll be kind and send us a photo of them set up after her wedding!

BRIDAL BABBLE: What is your favorite part of these DIY Pine Cones And Pumpkins Fall Wedding Centerpieces?
Monday, May 28, 2018

Glittered Wine Bottles Centerpieces

Update: This Glittered Wine Bottles Centerpiece tutorial post in 2012, after our engagement party. So the story is old. We're not getting remarried or re-engaged.

If you remember, I completely flipped out over engagemment party centerpieces. I couldn't think of an idea and spent countless hours on Pinterest, pinning things in hopes one would catch my eye.

My mom kept suggesting balloons and I kept shrugging them off. I didn't want a birthday party feel. I wanted something classy, something unique, something that needed more than heart-shaped balloons floating in the air.

All I really knew was I wanted something red. Our favors were heart-shaped chocolates and personalized peppermint patties that my mom sewed into red card stock.

The centerpieces had to be red as well.

We found a great idea of glittered wine bottles online, so, on Thanksgiving Eve, the biggest party night of the year, I was home crafting so I could make table centerpieces using wine bottles that I glittered.

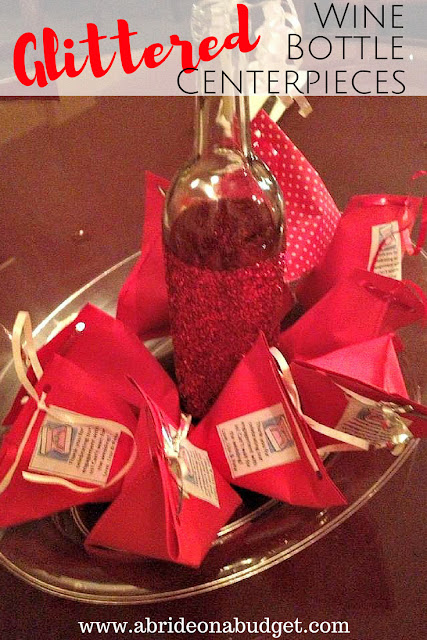
Need a wedding centerpiece or engagement party centerpiece idea? Check out these Glittered Wine Bottle Centerpieces on www.abrideonabudget.com. #glitter #winebottlecraft #winebottlecenterpiece #diyglitteredwinebottle

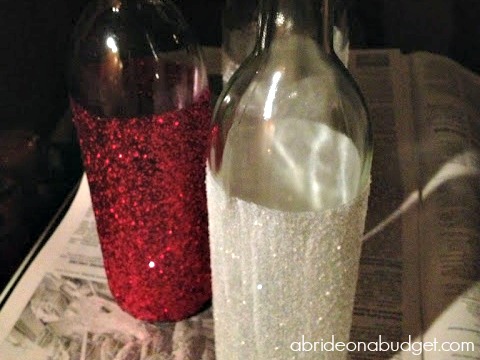
The centerpieces came out absolutely perfectly and were just what I wanted. A bit of class, a bit of homemade that didn't seem homemade, and under $20 for ten.

That's because my friend was able to pick up the wine bottles from a local restaurant. If you drink wine, you'll be able to just save your old wine bottles. If you don't drink, you can call your local restaurants or bars and see if you're able to pick some up from them.


Glittered Wine Bottles Centerpieces

What You'll Need:
What You'll Do:

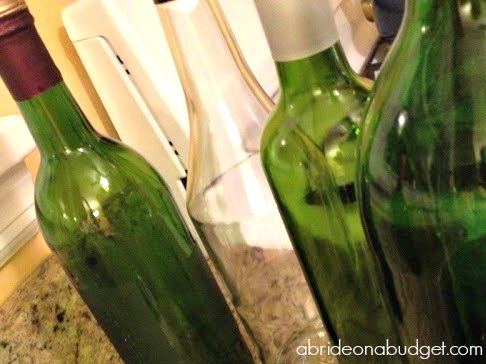
To start, you need wine bottles. I used a combination of green and white bottles because that's what we were able to get.

There will be only one centerpiece per table, so no one will really be comparing them all. They won't realize if the bottles are different sizes or shapes, so you can be very flexible.

Need a wedding centerpiece or engagement party centerpiece idea? Check out these Glittered Wine Bottle Centerpieces on www.abrideonabudget.com. #glitter #winebottlecraft #winebottlecenterpiece #diyglitteredwinebottle

Take the labels off the wine bottles. 

To do so, run them under hot water and scrub with steel wool. It won't ruin the wine bottles, just rub off the label.

If any sticky residue is left behind, a bit of olive oil on a paper towel will do the trick. I heard that Goo Gone will also do this, but I haven't actually ever used that ... mostly because I always have olive oil handy.

Need a wedding centerpiece or engagement party centerpiece idea? Check out these Glittered Wine Bottle Centerpieces on www.abrideonabudget.com. #glitter #winebottlecraft #winebottlecenterpiece #diyglitteredwinebottle

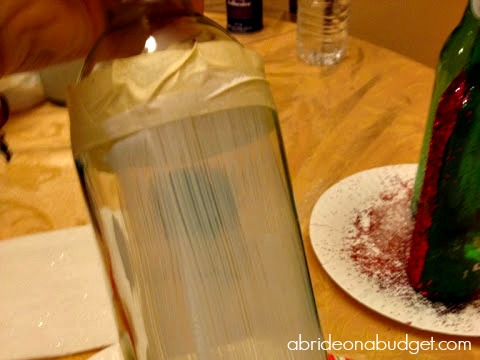
Take masking tape and wrap it around the top of the bottle. Try to be as straight as possible, but if you're not, it's okay. A little bit of character will do the bottle good.

If you want to cover the entire bottle in glitter, you can skip this step. I've seen them both ways, and they're both great. I left room up top, though, because I wanted the color of the bottle to come through.

Need a wedding centerpiece or engagement party centerpiece idea? Check out these Glittered Wine Bottle Centerpieces on www.abrideonabudget.com. #glitter #winebottlecraft #winebottlecenterpiece #diyglitteredwinebottle

You're going to need some Mod Podge for the next step. 

Need a wedding centerpiece or engagement party centerpiece idea? Check out these Glittered Wine Bottle Centerpieces on www.abrideonabudget.com. #glitter #winebottlecraft #winebottlecenterpiece #diyglitteredwinebottle

Cover the entire wine bottle, up to the tape, in Mod Podge. 

I used long thin streaks, but it really doesn't matter. The Mod Podge will dry clear, so even if it is uneven or blotchy, it will be fine when it dries. Trust me. I was using the "blot on as much as possible" method when I started and the next day, I couldn't tell the difference in techniques.

The only thing you should be concerned about is if you get bubbles in it. Those will remain after it dries, so try to avoid it bubbling.

Need a wedding centerpiece or engagement party centerpiece idea? Check out these Glittered Wine Bottle Centerpieces on www.abrideonabudget.com. #glitter #winebottlecraft #winebottlecenterpiece #diyglitteredwinebottle

Hold the wine bottle over a plate and pour the glitter on it. This is the best technique I found. 

I tried rolling it, I tried being stingy with the glitter. Nothing worked as well as getting messy and generous with the glitter. I bought a 4oz. glitter bottle and it was enough for nine bottles. The 10th was in red, not white, so that worked out for me.

Need a wedding centerpiece or engagement party centerpiece idea? Check out these Glittered Wine Bottle Centerpieces on www.abrideonabudget.com. #glitter #winebottlecraft #winebottlecenterpiece #diyglitteredwinebottle

When you're done, peel off the masking tape. I'd advise you do this over the plate since some excess glitter will fall -- and it's a pain in the rear to clean it up.

Need a wedding centerpiece or engagement party centerpiece idea? Check out these Glittered Wine Bottle Centerpieces on www.abrideonabudget.com. #glitter #winebottlecraft #winebottlecenterpiece #diyglitteredwinebottle

Ta-da!

You can use some wire cutters or a knife to cut the label off the top of the bottle, but at this point, you probably don't care and will just leave it.

Leave them to dry overnight.

Need a wedding centerpiece or engagement party centerpiece idea? Check out these Glittered Wine Bottle Centerpieces on www.abrideonabudget.com. #glitter #winebottlecraft #winebottlecenterpiece #diyglitteredwinebottle

Once they're completely dry, paint another layer of Mod Podge over the glitter to seal it. Let that dry overnight as well.

My mom made a little bit of curled ribbon to come out the top to act like an overflowing bottle of champagne. We placed them on a clear, hard tray in the middle of the table and surrounded them with the actual favors that my mom sewed.

These DIY glitter  bottles fit my criteria (cheap, disposable, and color coordinated to my theme) and everyone loved them. Success.

Since you left that space, you can brainstorm how to paint wine bottles for weddings. You might want to write the table numbers up top, your names, your wedding date, whatever fits. Just be sure to use a glass paint or it won't stay.

BRIDAL BABBLE: What do you think of these Glittered Wine Bottles centerpieces?

Want more DIY glitter projects?

Personalize your wedding with this super cute DIY Glitter Bridal Cake Server Set from www.abrideonabudget.com. #wedding #weddings #diybride #diy #diywedding

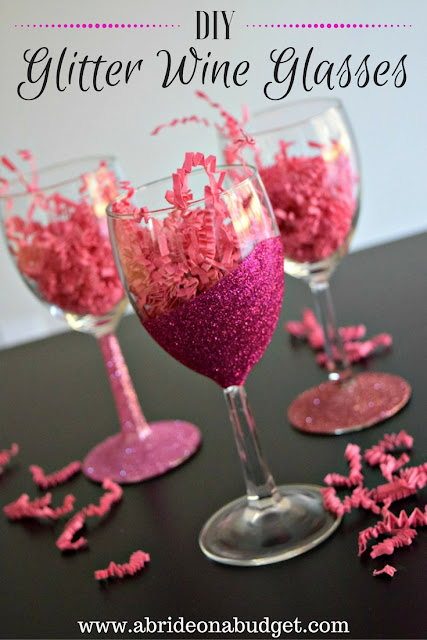
#ad Looking for a sparkling DIY? Check out these glitter wine glasses -- with an added sparkling juice -- from www.abrideonabudget.com. #dollartree

Wednesday, November 29, 2017

DIY Rope-Wrapped Floral Mason Jar Centerpiece

I'm a big fan of DIY wedding centerpieces. If you can decide what you want ahead of time, you can start working on them ahead of time and not have to stress and rush during wedding week. I'm giving you this advice now because I'm trying to find enough hours in the day to finish a DIY crocheted headband that I need to finish in 72 hours. It has to happen, but it's not going to happen without me crocheting way past my bedtime. So if you don't want to stay up past your bedtime during wedding week, you'll want to do as much as you can before wedding week.

So decide on your wedding centerpieces early and get to work on them. Or decide on simple ones that are easy to make like this  DIY Rope-Wrapped Floral Mason Jar Centerpiece.

Make your wedding stand out with these DIY Rope-Wrapped Floral Mason Jar Centerpiece from www.abrideonabudget.com.

DIY Rope-Wrapped Floral Mason Jar Centerpiece


What You'll Need:
What You'll Do:

Dab a bit of glue on the mason jar, right on the indentation, under the lid.

Stick the end of the twister cotton rope there and hold it until it is dried. Wrap the rope around the mason jar tightly.

Every few rows, you can stick another dollop of glue to make sure the rope is secure.

When you get to the bottom, put a dollop of glue, cut the rope, and glue the end of it down. Leave these to dry completely.

On your wedding day, fill these with flowers that match your bouquet.

When you're ordering your wedding flowers, be sure to let your florist know that you will be creating these centerpieces. The florist will help you decide what flowers to fill these with and how many flowers you'll need.

If you're doing your flowers wholesale, I would suggest hydrangeas as your large flower. They're a cheap flower and take up a lot of room, so you will only need one in each centerpiece to make it feel full. Then, fill the rest with smaller flowers or baby's breath.

BRIDAL BABBLE: Would you make these DIY Rope-Wrapped Floral Mason Jar Centerpieces?

Monday, July 10, 2017

DIY Beer Stein Centerpieces

Pete and I went to a beer and music festival a month ago. So I've been sitting on this post for a month. Crazy how life is like that, right? It seems like the days drag on, especially when you're waiting for 5 o'clock on a Friday, but next thing you know, weeks have passed.

That happens when you're wedding planning. You have months and months to plan, and you start taking your time, and all of a sudden, it's wedding month.

That's what happened and why this post is getting written up weeks after I intended to write it. But it's still a great DIY. So, like I said, Pete and I were at a beer and music festival last month and the VIP section had these DIY Beer Stein Centerpieces. I loved them and thought they would be perfect if you were having your wedding at a brewery.

If you're having a wedding at a brewery, or just love beer, you'll love these DIY beer stein wedding centerpieces from www.abrideonabudget.com.

DIY Beer Stein Centerpieces


What You'll Need:
What You'll Do:

Add a handful of yellow water beads to the bottom of a glass beer stein.

Fill the stein with water.

Top it with flowers (wide ones so it looks like beer foam).

Put one on each table.

BRIDAL BABBLE: Would you make these for your wedding?

Love beer?


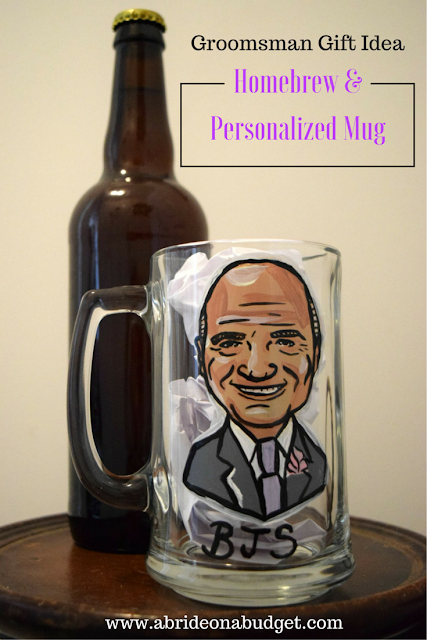
Groomsman Gift Idea: Homebrew & Personalized Mug

Wednesday, March 8, 2017

DIY Golf Wedding Centerpiece

When we were looking at venues, someone took us to see a ballroom at a golf course. "I don't play golf," Pete whispered to me during our tour. "So why would I want to get married at a golf course?"

He had a good point.

If you like to golf, though, and the US Open excites you, then a golf course may be your venue of choice. They usually have gorgeous ballrooms for members-only events that double as wedding venues. You don't have to be a member to host your event there, which is good.

If you are planning a golf wedding, I have a really cute golf wedding centerpiece for you to put together. It shouldn't take very long either, which means you can make them all in one evening and then move on to other wedding tasks.

Do you love to golf? Or are you getting married at a golf course? These DIY golf wedding centerpieces from www.abrideonabudget.com are perfect.


DIY Golf Wedding Centerpiece


What You'll Need:

What You'll Do:

Cut the astroturf to look (sort of) like a fairway, about one foot from end to end, then about eight inches at the widest portion. You can totally freehand this no problem, but I'm a little OCD about everything wedding. So what I would do is this: The astroturf linked above comes in a 4-foot by 6-foot sheet. I would cut it into 36 1-foot by 8 inch rectangles. Then, cut the fairway from that. That way, they'll all be slightly different but the same uniform size.

Place flowers in the vase and put it in the middle of your fairway.

Put one golf ball and golf tee on the other end.


Do you love to golf? Or are you getting married at a golf course? These DIY golf wedding centerpieces from www.abrideonabudget.com are perfect.

Set one in the center of each table and you're done.

After the wedding, you can even donate these back to the golf course. They might want to use them for those members-only events we were talking about. Plus, when your wedding is over, you're not really gonna have a need for all of them. You might want to save one, though, in case you decide to host a party during the Masters.

BRIDAL BABBLE: Would you make this golf wedding centerpiece for your golf wedding?

Planning a golf wedding?

Monday, February 6, 2017

Lucky In Love Lotto Ticket Centerpiece

I take walks daily. I have a goal I set for myself daily, and I've only missed my goal once this whole year. I'm pretty impressed with myself. I'm still getting points for walking, but mostly I just do it because I set a goal.

A lot of my walking time is spent playing Pokémon, but a lot of it is spent brainstorming blog posts. Even when I'm relaxing, my brain is still thinking about work. So on my walk the other day, I picked up a really nice stick, then spent the rest of my walk trying to figure out what to do with it.

It hit me.

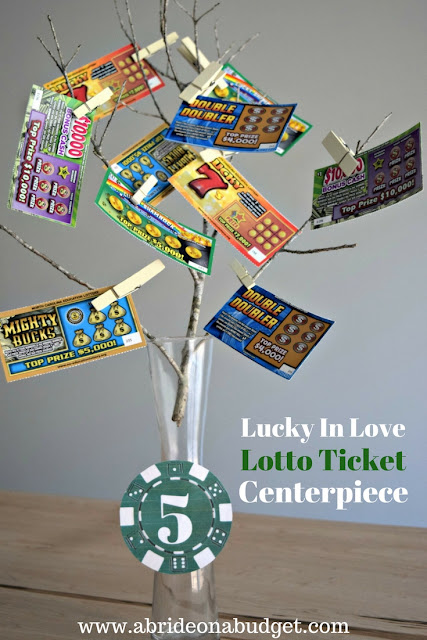
I would make a Lucky In Love Lotto Ticket Centerpiece. I absolutely loved the idea and was so excited to get home and put it together. Not excited enough to run the rest of my walk, but still, excited nonetheless.

Lucky In Love Lotto Ticket Centerpiece


Planning a lucky in love themed wedding? Or maybe just love gambling? Put together these lucky in love lotto ticket centerpieces, plus get a free printable for the poker chip table numbers from www.abrideonabudget.com.

I'm lucky that the community next to me, where I walk, has really beautiful trees. The ones in my community are different, and the sticks are all brown. But the ones where I walk are partially white, so there's no need to dress them up. If you only have brown sticks, though, you might want to spray paint them if you're not a fan of brown.

Planning a lucky in love themed wedding? Or maybe just love gambling? Put together these lucky in love lotto ticket centerpieces, plus get a free printable for the poker chip table numbers from www.abrideonabudget.com.

What You'll Need:

What You'll Do:

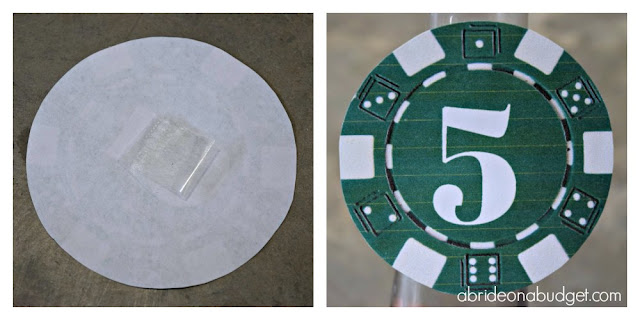
Print out the poker chip table numbers printable below.

Planning a lucky in love themed wedding? Or maybe just love gambling? Put together these lucky in love lotto ticket centerpieces, plus get a free printable for the poker chip table numbers from www.abrideonabudget.com.

The printable is formatted to fit on an 8.5x11 sheet of paper, so you can print it at home. I would suggest printing it on card stock instead of plain printer paper to make it a little more sturdy.

Planning a lucky in love themed wedding? Or maybe just love gambling? Put together these lucky in love lotto ticket centerpieces, plus get a free printable for the poker chip table numbers from www.abrideonabudget.com.

Cut out the poker chip table numbers.

Planning a lucky in love themed wedding? Or maybe just love gambling? Put together these lucky in love lotto ticket centerpieces, plus get a free printable for the poker chip table numbers from www.abrideonabudget.com.
Tape each number to a small vase.

Now, I only made these in numbers 1 to 6 because that's all that fit on my sheet. But, if you actually want to use these at your wedding and you have more than six tables, just shoot me a quick email and I'll create additional numbers for you.

Planning a lucky in love themed wedding? Or maybe just love gambling? Put together these lucky in love lotto ticket centerpieces, plus get a free printable for the poker chip table numbers from www.abrideonabudget.com.

Use the clothespins to stick the lotto tickets on to the branches.

Put the stick into the vase, and set it on your tables.

If you want to dress up the table more, you could spread out a pack of playing cards or poker chips. If you're going with this theme, you probably like to gamble and probably have cards and chips at home already (so free decorations!).

You could do something fun at your wedding with these too. On the back of one menu at each table, put a heart. Then, before dinner, have the DJ announce that whoever has the heart on their menu will get to take home the centerpiece at the end of the night. Who knows. Someone might get lucky on your wedding night!

BRIDAL BABBLE: Would you make these Lucky In Love Lotto Ticket Centerpieces?


Planning a Lucky In Love themed wedding?


Monday, August 8, 2016

Mason Jar Luminary Leaf Centerpieces

When you think of a fall wedding, you think of tones that are warm and inviting. You think of being cozy. And you think of leaves.

At least, that's what I thought of when I was coming up with ideas for a fall wedding centerpiece. I also decided this was a good time to create a mason jar craft since I actually haven't done any of those on A Bride On A Budget yet, despite mason jars crawling their way into a ton of wedding themes. After a ton of thought (I actually enlisted three people to help), I came up with these mason jar luminary leaf centerpieces. They're perfect as a fall wedding centerpiece or a centerpiece for any other fall party you might be having.

Mason-Jar-Luminary-Leaf-Centerpieces

They were easy to make, although they did take a bit of time since I left them to dry overnight before finishing them. After I added everything up, these are under $5. For a centerpiece, that's an incredible price.

Mason-Jar-Luminary-Leaf-Centerpieces

Mason Jar Luminary Leaf Centerpieces


What You'll Need:
What You'll Do:


Mason-Jar-Luminary-Leaf-Centerpieces

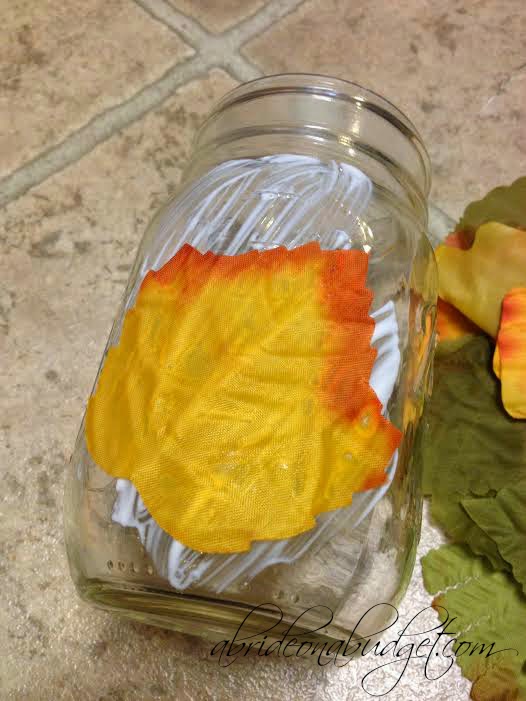
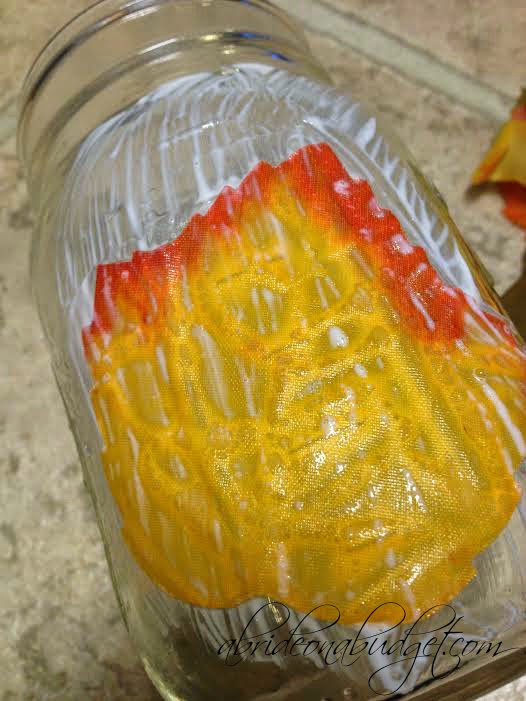
Paint Mod Podge on a section of the mason jar.

Mason-Jar-Luminary-Leaf-Centerpieces

Stick one of the leaves onto the jar.

Mason-Jar-Luminary-Leaf-Centerpieces

Paint Mod Podge over the leaf.

Mason-Jar-Luminary-Leaf-Centerpieces

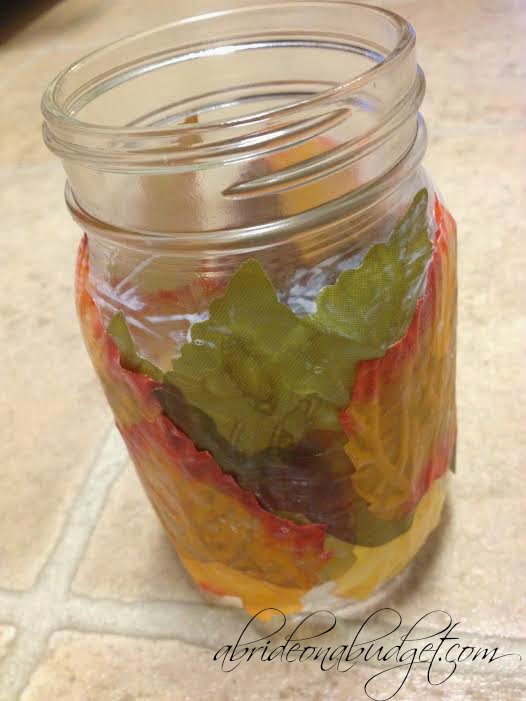
Continue around the jar, layering the leaves as you want.

Now, this is a good time to point out that many of the leaves came folded. It was a big part of the reviews on Oriental Trading's site, but for this project, I didn't care. The leaves would be flat with a layer of Mod Podge over and under them, so folds wouldn't affect my project. If you were using these to decorate on their own, you need to keep this in mind.

Don't worry about being neat with the Mod Podge or that you can see white on the jar. This will dry clear.

At this point, leave these overnight to dry completely.

mason jar centerpiece

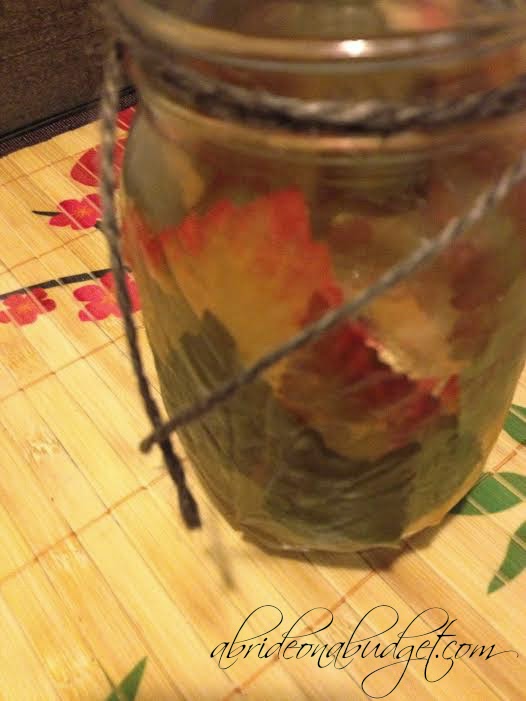
The next day, wrap the jute cording around the top of the jar. Double knot it and cut the excess cording.

mason jar centerpiece

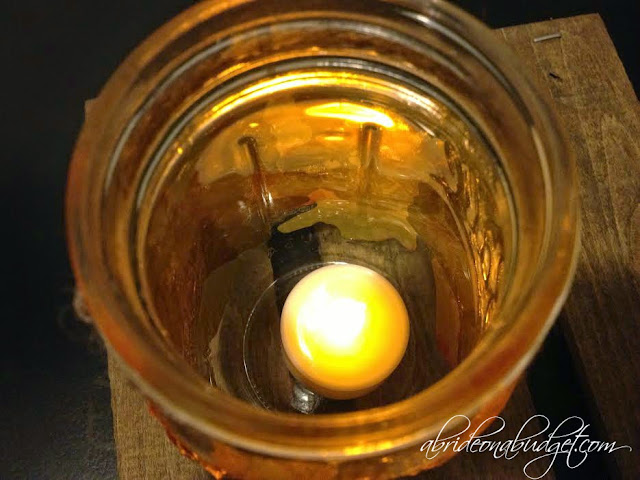
Drop a flameless tea light into the jar.

mason jar centerpiece

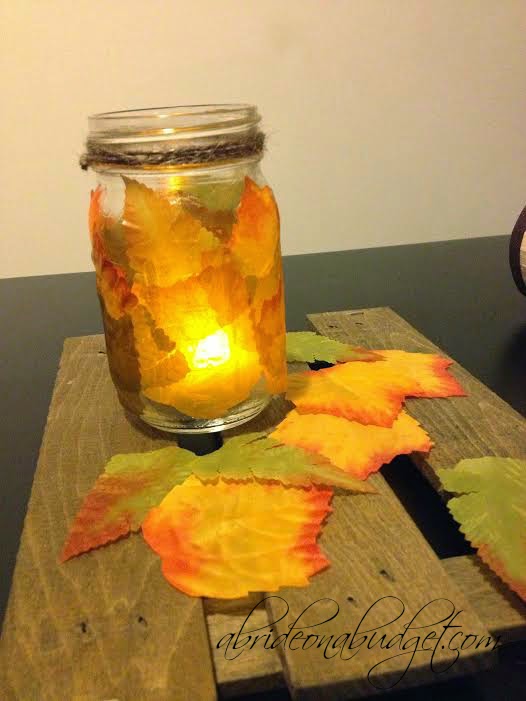
Scatter some of the leaves around as decorations and your mason jar luminary leaf centerpieces are complete.

BRIDAL BABBLE: Would you make these mason jar luminary leaf centerpieces as fall wedding centerpieces?

Wednesday, April 6, 2016

Beach Wedding Mason Jar Centerpieces

There comes a time in every bride-to-be's planning when she just says, "Oh forget it. I don't even care anymore." And whatever task was happening right before that statement, it gets done in the easiest way possible.

For me, it was the menus. We had a handful of days until the wedding and I just couldn't deal with them anymore. The design wasn't coming out the way I wanted, I had no desire to actually order them, and my lack of color ink meant they were going to be black and white. "Oh forget it," I said on the wrong side of 6am. "I don't even care anymore." I finished them quickly, printed them on printer paper, and that was that. They actually came out beautifully and I really liked them, so I'm glad I followed the path of least resistance that time.

If you're at that point with your beach wedding centerpieces, don't worry. I have a simple DIY tutorial for these really easy, but very pretty, mason jar centerpieces. You can put them all together in a handful of minutes and move on to the next task.

Are you planning your beach wedding but have NO IDEA what to do for centerpieces? Don't worry! These beach wedding mason jar centerpieces are the answer. Plus, they're PRETTY and EASY! Head to www.abrideonabudget.com for the tutorial.

Beach Wedding Mason Jar Centerpieces


What You'll Need:
  • Mason jars with handles
  • Tea lights
  • Sand (which you can get on the beach for free or you can buy here. Personally, I'm part of the "use the free sand on the beach" camp, but a lot of crafters worry about bugs being in the sand so they purchase craft sand. Follow your heart on that one.)
  • Seashells, optional (again, I'd go with free on the beach if you thought you needed them, which is what I actually did for ours, but you can buy them here)

What You'll Do:
  • Fill the mason jar with about an inch of sand.
  • Place the tea light in the middle.
  • You're done (unless you want to add a few shells around the tea light).
Are you planning your beach wedding but have NO IDEA what to do for centerpieces? Don't worry! These beach wedding mason jar centerpieces are the answer. Plus, they're PRETTY and EASY! Head to www.abrideonabudget.com for the tutorial.

Seriously, it's one of the easiest mason jar centerpieces there is, especially if you buy the mason jars with handles. Those will come to you with handles that fit already on your mason jar. You don't have to worry about wire clippers and figuring out how to make a handle. Makes your life easier, plus the handle does make a big difference since these are already so simple. Make one for each table, plus an extra or two for your welcome table, and that's it. You can light the candle on your wedding day (or not; either way is pretty).

BRIDAL BABBLE: Do you think you could make these beach wedding mason jar centerpieces?

Thursday, July 30, 2015

Japanese Crane Centerpiece Idea

We were in Japan earlier this month and spent a night at a country inn in Tamba. We had such a good time wearing kimonos, sleeping on tatami floors, and eating a traditional Japanese BBQ.

But you know me. My brain is always in wedding mode. So when I was heading to our room, I noticed these adorable Japanese crane decorations. The inn used them as window decorations, but I just loved the idea of using them as wedding centerpieces. I didn't make these (obviously), but I did put together the DIY below so you could make these Japanese crane centerpiece for your wedding.


Japanese Crane Centerpiece Idea


What You'll Need:
What You'll Do:

Prepare the pine cone for crafting (we have a post about that here). Paint the front of the pine cone white. Let it dry completely. Paint the tip of the pine cone black. Let it dry completely.

Cut two 2.5 inch pieces from a bamboo stake (try and match the size of the pine cone, more or less). These will be the legs. Paint the middle inch white. Let it dry. Paint the top half inch black. Let it dry.

Cut one 2 inch piece from a bamboo stake. This will be the head and neck. Paint it completely white. Let it dry. Paint the front of it black, the top of it red, and paint black eyes on it. Crazy glue a sliver of the bamboo stake on it to make the beak.

When everything is completely dry, glue the legs onto the bottom of the pine cone. Glue the head on. Then, glue the entire Japanese crane to the wood base. You can jazz it up and paint a flower on it (like the example above) or a table number (like the example below).


This crane had wings attached, made of wood of some sort that was painted and glued on.

I absolutely loved these little decorations. These Japanese cranes would be perfect for your wedding decor. Plus, cranes represent good fortune and longevity to the Japanese, which is the perfect sentiment for your wedding.

BRIDAL BABBLE: What do you think of this Japanese crane centerpiece idea?

Tuesday, June 9, 2015

Homemade Cow Centerpiece

My friend recently sent me a photo of a milk jug-turned-cow and told me it was a great idea for a wedding centerpiece for a farm-themed wedding. My first thought was, "I would never have a farm-themed wedding" and my second thought was, "I will never have another wedding, so it's really not about me right now, is it?"

And, as luck would have it, we actually had a nearly-empty milk jug in our fridge. When I used the last bit for coffee the next day, I looked at the empty milk jug and asked if it wanted to become a cow.

(And yes, I did actually ask it because I work at home, by myself, with a cat. And Pete works 14 hour days twice a week, including the day this story took place. And when I call people, they only answer because they are concerned that something must be wrong since I called instead of texted. But really, if I call you. You should answer. Something must be wrong with me if part of my daily communication involves an empty milk jug.)

The milk jug did not reply -- I'm not that crazy -- but I took the silence to mean that yes, this homemade cow centerpiece project was happening. (In case you are concerned about a lack of social interaction on my part, don't worry. I did receive a text from a friend while I was making this. And Pete came with me to shoot the final photo. I'm not a crazy cat lady just yet.)

homemade cow centerpiece

Homemade Cow Centerpiece


homemade cow centerpiece

What You'll Need:

What You'll Do:


homemade cow centerpiece

Cut a thick strip of the black cardstock (my strip was about an inch and a half, but yours may vary based on the size of your milk jug).

homemade cow centerpiece

Cut that strip in half. Add glue to one end and roll the black strip into a small cylinder. Glue this under the milk jug as legs. Let it dry completely.

If your jug won't stand on its legs, you can tape a "u" on the inside. Have the two sides of the u inside the cylinder and the bottom of the u at the cylinder's base. Then, affix the bottom of the u to the milk jug.

homemade cow centerpiece

Using the black paper, cut out two round circles. With the white paper, cut out two smaller circles. Then, go back to the black and cut out two even smaller circles. Glue them in this order to create eyes.

I free handed these, but I did fold the piece of paper in half before cutting so they would be symmetrical (even though it doesn't look like it at all in the photo above).

homemade cow centerpiece

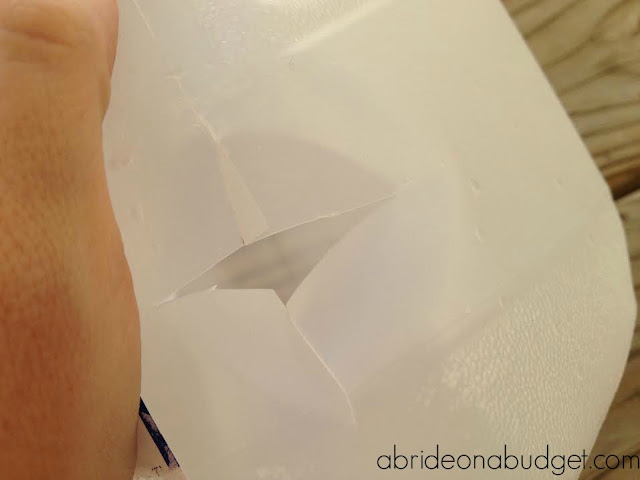
Cut out two large "spots" from black paper to glue onto the milk jug. Try not to cut too evenly or it will look more like a cloud than a spot. Also, be conscious of the circle "ditch" in the milk jug. You'll want to cut a spot large enough to cover that. Glue one spot over that, then another on the other side.

homemade cow centerpiece

Time to make the ears.

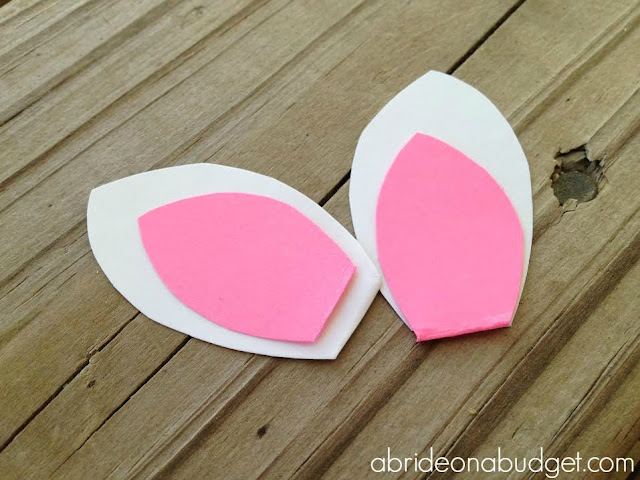
Cut a white sheet into a ear shape. Cut the same shape, but smaller, in pink. Glue them in that order to make your ears. Glue them above the eyes on your cow.

homemade cow centerpiece

Trace the milk jug's top to make a pink circle.

homemade cow centerpiece

Glue that onto your top.

homemade cow centerpiece

Cut a long, thin pink strip. Glue it around the rest of the top.

Now, I understand this pink nose sort of makes my cow look like a pig. You could make his nose black or white instead, but I just thought it needed some color other than the pink in its ears. This is a wedding, and anywhere you can add a pop of color is alright with me.

homemade cow centerpiece

In  the underside, just a plus sign with your scissors. This is where you'll slide in the tea light.

Be sure to only use a battery-operated tea light in this. You don't want to set it on fire.

homemade cow centerpiece

Ta da.

So cute, right? You could definitely use nail polish remover to take off the lot number and expiration date from the side of your cow's face. If you are using this for your wedding, I definitely would do that.

homemade cow centerpiece

Isn't he just so cute?

homemade cow centerpiece

He's even cute at night too.

You could actually turn on the tea light when you are setting these up and then allow them to illuminate when it starts to get dark out. You don't want to try and dig in your cow to get the tea light when you are already using these as your centerpieces (it's not that easy, honestly) so make sure you pick up tea lights that are long lasting.

BRIDAL BABBLE: Would you make this homemade cow centerpiece?