You can make them at home yourself whenever you have time, then save them until your wedding day.
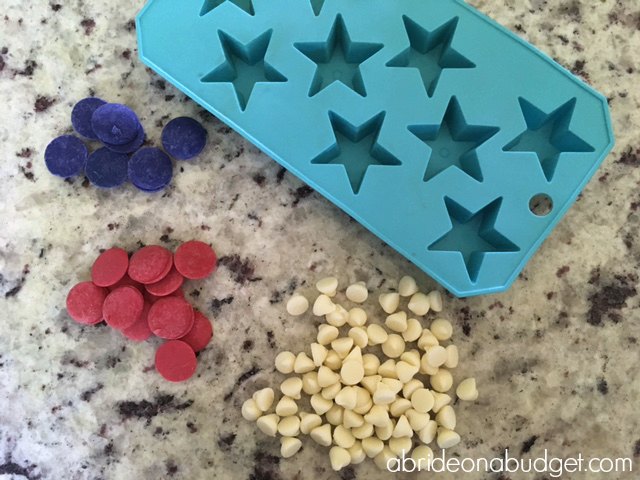
I made them using a star-shaped silicone mold. If you're making these for your wedding, I would recommend picking up multiple molds. It would take you a really long time to make enough for all your guests if you could only make a couple at a time.
Homemade Red, White, And Blue Chocolate Star Wedding Favors
Now, small aside: I'm making them red, white, and blue in this tutorial because I'm posting this on Memorial Day Weekend. Honestly, you can make them any colors you want.
- Red candy melts
- Blue candy melts
- White chocolate chips
- Star-shaped silicone mold
- Plastic treat bags
- Red card stock
- Blue card stock
- White curling ribbon
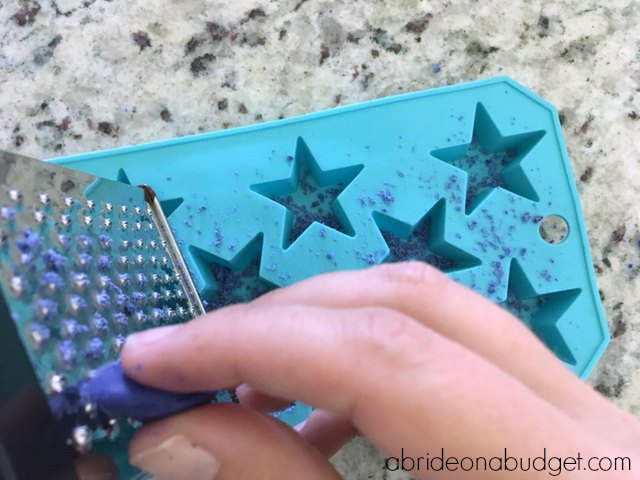
Using the garlic grater side of a cheese grater, shave the blue then red candy melts into the cavities of the star-shaped mold.
You don't want to completely fill the bottom with shavings. You do want to see the white through some of it.
And don't worry if you end up getting some of the shavings on the side. They'll add to the character of these.
Melt the white chocolate chips in a microwavable-safe bowl. I suggest regular chocolate chips for this instead of white candy melts. Personally, I don't love the taste of candy melts (although they have gotten better recently), so I vote for white chocolate chips instead.
Melt them for 30 seconds, then stir. Put them back in the microwave for another 30 seconds, then stir. Continue this until the chocolate chips are completely melted.
Spoon a dollop of melted white chocolate into each star-shaped cavity in the mold. Don't overfill them because then the bottom of these won't sit flat. You're putting them in a plastic bag, so it's not the biggest deal if they're not perfectly flat, but I really am a perfectionist when it comes to anything wedding.
Bounce the silicone mold on your countertop a few times. That will flatten out the melted white chocolate.
If you're like me and you were messy when you were shaving the red and blue candy melts, the extra shavings along the top of the mold will fall into your chocolate when you're bouncing the mold. I think it's okay but if you're even more of a perfectionist than I am, you'll want to wipe the mold off before scooping the white chocolate.
Put them in the fridge to cool completely before popping them out of the mold. They'll come out so easily and without any real effort. Put them in a bag to sit in your fridge until you're ready to package them.
When you are, cut thin, long strips of red and blue card stock. Fold them back and forth, like an accordion. Then, cut them every two or so inches to create paper shred (or you could just purchase paper shred if you don't feel like making it).
Add the paper shred to the bottom of a plastic treat bag.
Put two or three red, white, and blue chocolate stars into the bag. Tie it with a white ribbon.
Put two or three red, white, and blue chocolate stars into the bag. Tie it with a white ribbon.
Place one at each guest's seat at your wedding.
BRIDAL BABBLE: Would you make these Homemade Red, White, And Blue Chocolate Star Wedding Favors?
Want more Homemade Edible Wedding Favor ideas?
Homemade S'mores Fudge Wedding Favors


I love the red, white and blue stars. Why wait until a wedding? These are perfect for a patriotic holiday, birthday party or just a hail to the red, white and blue snack. Thanks for sharing on Sunday's Best.
ReplyDelete