Glitter and sparkles are what little girls' dreams are filled with. That and their wedding day. Who is their Prince Charming going to be and what type of horse will he ride in on. Girls grow up into women and start planning weddings to men who are more likely to drive a car than ride a horse (although marrying a rancher could be a pretty great life, it isn't the one most ladies end up in).
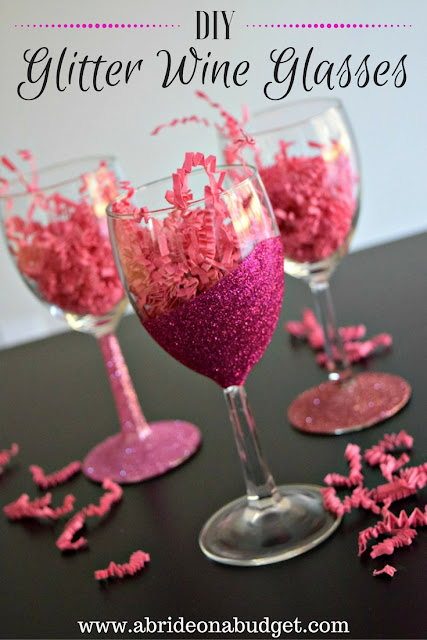
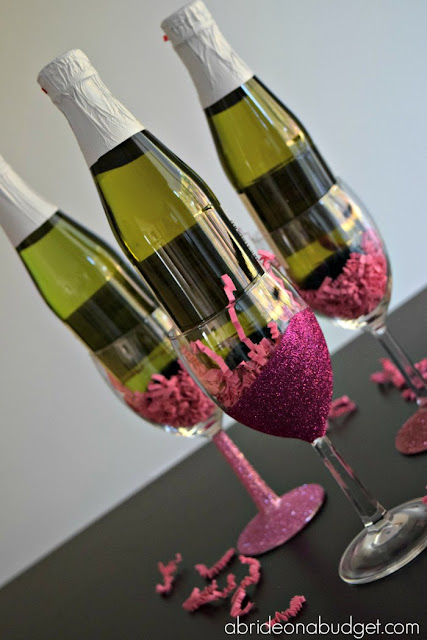
None of that growing up means you have to give up sparkles. I mean, who doesn't just feel a little bit fancier in a top that glimmers when the light hits it just right. So, of course, I am a huge fan of these glitter wine glasses I made. They're perfect for you and your bridesmaids to use on wedding morning. That's a fancy way to start the biggest day of your life.
DIY Glitter Wine Glasses
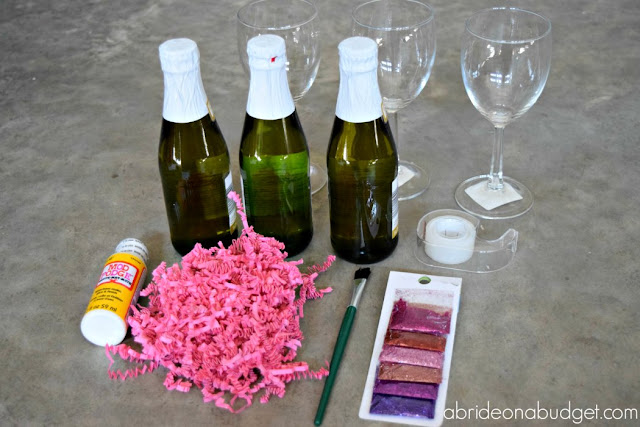
I made these wine glasses using only items I found at my local Dollar Tree. Since everything there is $1, it makes projects like these incredibly affordable. Saving money on these sorts of wedding projects allows you more cushion in your budget for other items -- like a champagne toast maybe -- that you couldn't afford otherwise.
What You'll Need:
What You'll Do:
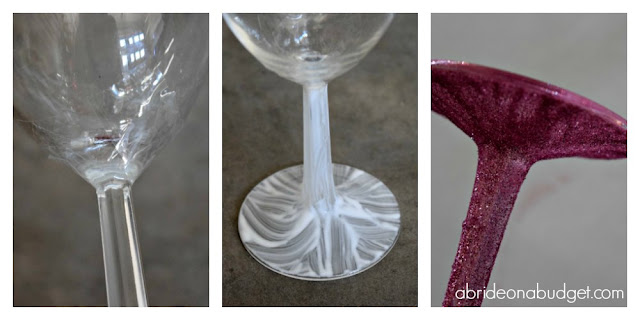
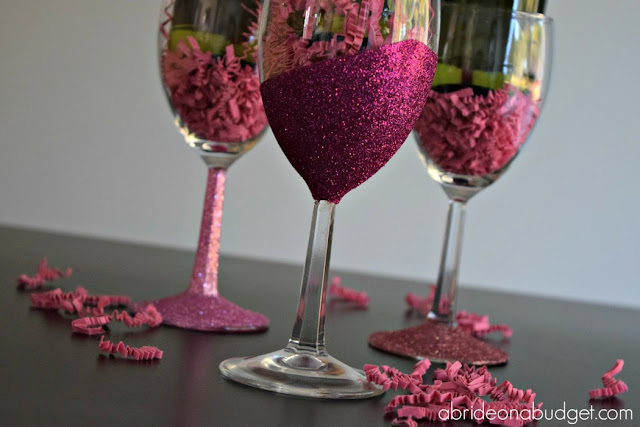
Start by deciding how you want to design your glasses. I made three different designs to help you decide. I did just the base, the stem and base, and a design on the goblet.
Whatever you choose, start by using the tape to section off the area where you want to apply the glitter. If your local Dollar Tree has painter's tape, you can go with that. Mine didn't, so I just used regular tape. It worked fine.
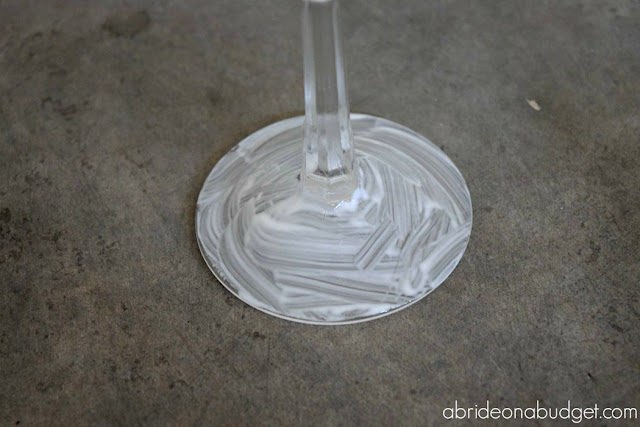
Paint the Mod Podge (which YES! I found at my local Dollar Tree! What a hot find!) onto the section where you want your glitter.
A thin layer of Mod Podge works well.
When the Mod Podge is still wet, sprinkle on your glitter. I actually did this over a sheet of paper because I didn't want glitter all of the place. It made it easier to clean up too because I just rolled the paper into a funnel shape, stuck it in the glitter pack, and poured the excess back in the bag.
I loved the glitter I found at Dollar Tree, mostly because it was really fine flakes. They don't leave gaps in your project like large glitter does. And since the space on a wine glass is quite small, the tiny glitter is better. Each of these small packets was more than enough for each glass. Since it comes with six packets, you could do at least six glitter wine glasses per pack. That's a bargain!
If you brush off the excess glitter and realize you missed a spot, no worries. Just very carefully paint on a bit more Modge Podge and sprinkle that spot with glitter. It'll blend right in.
Continue with the rest of your glasses.
You can vary every design too, which is so much fun.
After you're done glittering, apply one more layer of Mod Podge to seal in the glitter. Then, let the glasses dry. I left mine overnight, just to be sure.
When they're dry, dust off any loose glitter and remove the tape.
Fill the glasses with the decorative shred.
Then add a bottle of sparkling grape juice or cider. I was actually pretty impressed that my local Dollar Tree carried these individual bottles. It was the perfect thing to pair with my wine glasses.
Want to order these items from Dollar Tree's website? Now is the time to do it! Today though Saturday, November 26, you can get $4.95 flat rate shipping on your entire order during Dollar Tree's Black Friday event!
BRIDAL BABBLE: How would you design these DIY glitter wine bottles?






What a fun and pretty way to dress up glasses for so many occasions! I am thinking about these for NYE! Thank you so much for sharing!
ReplyDeleteOooh, how jazzy! Great idea. Thanks for sharing :) My glasses are about to be sparkling!!
ReplyDeleteThis is a fantastic idea for adding sparkle to the tables! And it's so easy to do, too! Thanks for sharing the idea.
ReplyDeleteWhat a fun idea!!! I love getting wine glasses at the Dollar Tree!! I just got snowflake ones there the other day!
ReplyDeleteGlitter is a girls best friend. I love these lovely wine glasses and so happy you shared at Dishing it and Digging it link party. We love having you.
ReplyDelete