If you're having a fall wedding, you should definitely consider using them in your centerpieces or escort cards. They're festive and timely, but, even better than that, they're free. Just look in your backyard and you should have some. And if you don't, ask your bridal party to check their homes. Or, if you're getting in shape, take a walk outdoors and look around for some. Just be sure to carry a plastic bag with you in case you do find any since they can be sticky from sap and dangerous because of the small points on the edges.
But you can't just take pine cones from the woods and put them on a table and that's that. No, you have to properly prepare pine cones.
How?
It's actually really easy, just a bit time consuming.
How To Properly Prepare Pine Cones For Crafting
What You'll Need:
- Pine Cones
- Foil
- Large cookie sheet
- Oven
What You'll Do:
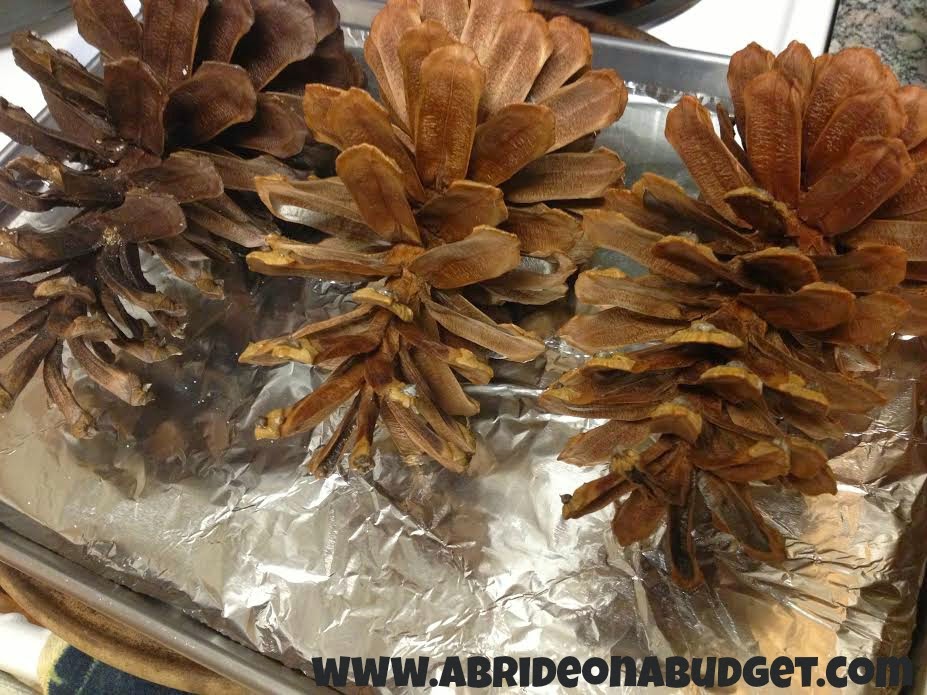
Place the pine cones on a foil-lined cookie sheet.
Bake at 350-degrees for 30 minutes.
Leave the pine cones on the foil-lined cookie sheet to cool for 24 hours. Any sap and/or insects will be caught on the foil, so you'll want to leave this just as is. The leaves of the pine cone will actually open a little, making them fuller than they were when you put them in the oven.
You can then decorate them with paint, glitter, and more.
BRIDAL BABBLE: How would you decorate using pine cones?
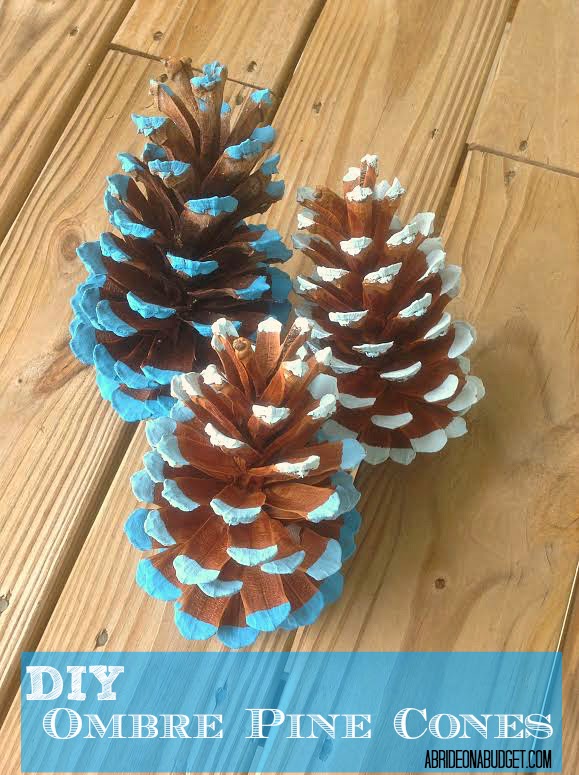
What did we do with our pine cones? | |
|---|---|
Made DIY Ombre Pine Cones.
Check out our tutorial here.
|


Thank you for sharing this with us, I always wondered about this.
ReplyDeletethanks for such awesome idea. its so easy to make and i love crafting its my passion and i love teaching small children craft work too. this is something i can teach them.
ReplyDeleteLove this. I never knew this but always wanted to try. If youd like to make a gift of pinecones in a basket that a person throws in the fire place to make the fire different colors while they burn, do you just add different colors of wax to the leaves of the pinecone? or is that some fancy chemical they put on them?
ReplyDeleteThanks for the tips. I love using pine cones in crafting.
ReplyDeleteaha! The sap melts and drips off! yea, natural pine cones are messy. Good info to know!
ReplyDeleteWow! I did not know you put the pines cones in the oven. We love pine cones
ReplyDeleteWow! I did not know you had to place pine cones in the oven! nice to know thanks
ReplyDeleteI love using pine cones year round for crafting!
ReplyDeleteThis is such great knowledge! Ive always wondered if anything should be done before using them for crafting and what do you know?!?!? Thanks!
ReplyDeleteThanks. I did not know this. My kids love to make bird feeders with them in the winter time.
ReplyDeleteI love to sprinkle glitter onto pinecones!
ReplyDeleteThanks for the idea of preparing pine cones for decorating. I never have put them in the oven before but good idea. I usually just find big pine cones and spray paint and add some glitter for Christmas.
ReplyDeleteI used to make pine cones for Christmas and I enjoyed doing it was so much fun and you can give them as gifts. Thank you, Jerri Davis
ReplyDeleteI didn't realize the preparation that was required. Thanks for the tip!
ReplyDeleteThanks i did not know all of this
ReplyDeleteThis is very interesting. I never heard of putting the pine cones in the oven. I wanted to start working with them since I am surrounded by pines. Thanks so much for the helpful review.
ReplyDeleteI had no idea that pinecones should be prepped before crafting. Thanks for the tips. ;)
ReplyDeleteWe have pine trees in our backyard and I usually just throw them away. This project would put them to good use.
ReplyDeleteAwesome idea!
ReplyDeleteI had no idea that you're supposed to do this! I love the way they look spray painted gold!
ReplyDeleteThank you for the info. Didn't know about doing this. I like to decorate in the fall & winter with pine cones.
ReplyDeleteI had no idea you had to prepare them first. Thanks for the info.
ReplyDeleteWe have so many pine trees in our yard. I always wondered how people got the pinecones to look and keep so long. Thanks for the tip>
ReplyDeleteThanks for sharing, this is such a great idea
ReplyDeleteI never knew you needed to do anything to prepare them. Thanks for the info.
ReplyDeleteI did not know you need to do that- you learn something new everyday! thanks for sharing~
ReplyDeleteWow! I had no idea. Thanks for the tip.
ReplyDeleteI guess I am very unexperienced with crafting with pine cones, because I never knew that you needed to prepare them. Interesting. Thanks for the info.
ReplyDeleteWe like to use pine cone for crafts. ~Kristin
ReplyDeleteI have never used pine cones for crafting but if I did I would paint them gold and that would be it, less is more. Thank you for sharing this post, now I know how to properly prepare pine cones for crafting.
ReplyDeleteThis is nice to know
ReplyDeleteI never thought about what you need to do to do crafts with pinecones. Thanks for the info
ReplyDeleteslehan at juno dot com
My mother, aunt and grandmas used to always make crafts out of pinecones, primarily because the pinecones were free.
ReplyDeleteI did notice the pine cones were more open - how nice! This is the first I've heard of preparing pine cones it sounds excellent, even if you have to do several batches!
ReplyDelete