My mom was here for two weeks to help plan for the wedding. During the day, we would go to hotels to try to book rooms (unsuccessful) and dress shopping (successful).
At night, we (and by we, I mean she) would make favors. One hundred and fifty beautiful favors.
Pete and I offered to help, but she just sat and made them all herself. My contribution was that I picked out the idea and picked up the supplies. Pete helped by getting her a desk lamp when the light bulb in our living room blew.
I was on the Oriental Trading website, which has a ton of items for weddings. You can pick up everything from aisle runners to bubbles to ring bearer pillows. You can pick up items individually and put together your own projects, or you can browse the site and check out project ideas.
I got lost on the site for hours before deciding that the Beach Candy Buckets Project was the best idea for our favors. I knew exactly what I needed to order because it's actually listed on the site itself. No guessing needed.
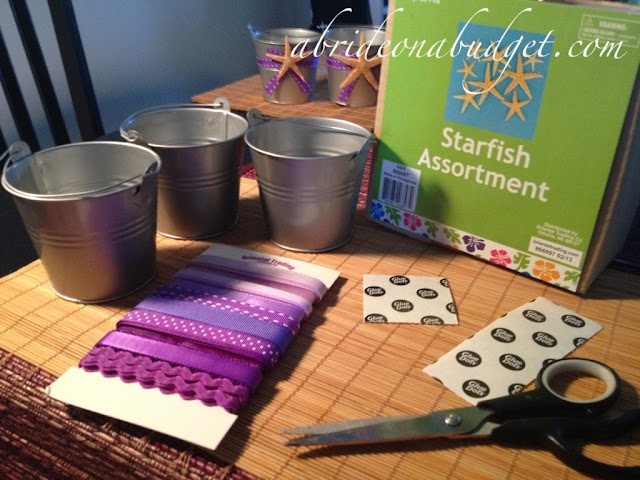
Beach Candy Buckets Wedding Favor
What You'll Need*:
- Natural Starfish assortment
- Purple ribbon assortment
- Silvertone pails with handles
- Tux and gown wedding buttermints
- Purple beverage napkins (or you could use a purple tissue paper, but I wanted something a little heavier)
- Scissors
- Mini Glue Dots
- XL Glue Dots
*Our colors are eggplant, lilac, and silver, but you can choose any colors you prefer.
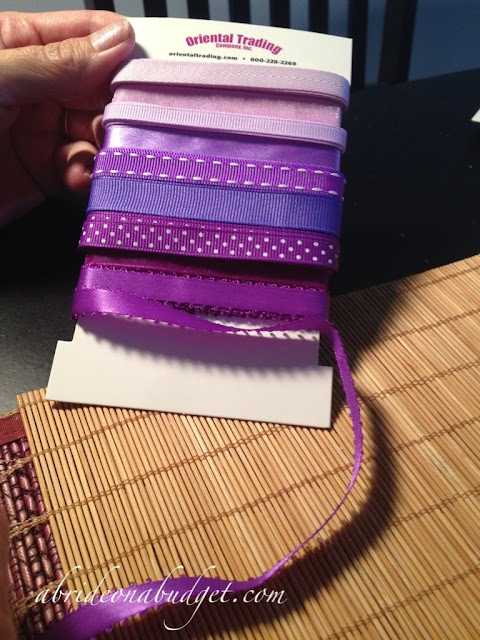
What You'll Do:
To start, you need to unravel the ribbon. Now, here's where I messed up. I saw there were 10 pieces of ribbon in each package. I assumed each ribbon was short. It wasn't until just now, when I was checking to link the ribbon in the post, that I realized the ribbon is two yards. Some of the ribbon cannot be used for this project (the second and fourth from the top are tulle-like ribbons that are too see through to work). But, with eight types of ribbon that will work perfectly, I overestimated the amount that we needed.

Wrap the ribbon around the bucket, being sure to overlap to make two top points.
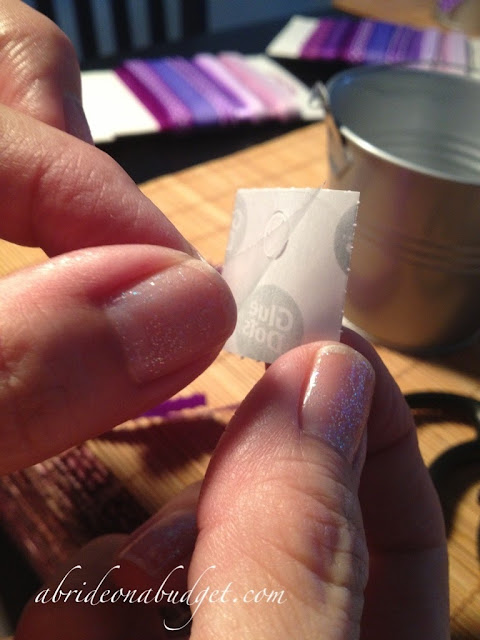
Pull a mini Glue Dot from its backing.
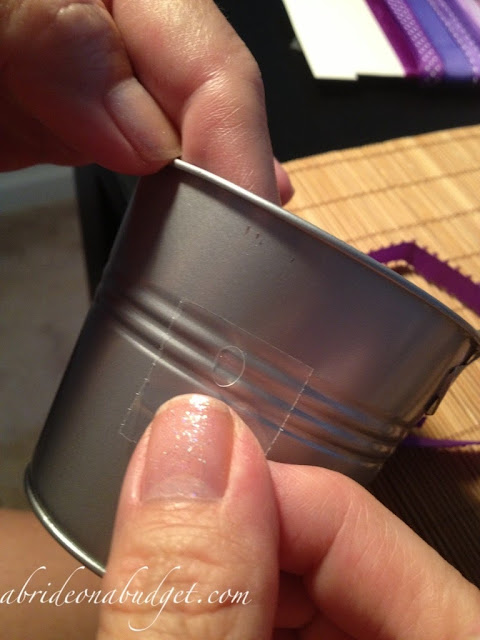
And affix it directly onto the bucket before pulling the clear plastic away.
We had a few Glue Dot causalities when we tried pulling the dot directly from the backing to place it on the bucket. This method is fool proof.

Start at the Glue Dot, and wrap the ribbon around the bucket.

Take an XL Glue Dot and cut it in half.

Crisscross the ribbon on the front of the bucket.

And stick the half of an XL Glue Dot in the middle.

Fold a piece of ribbon, about an inch or so wide, on top of itself.

Cut at the fold.
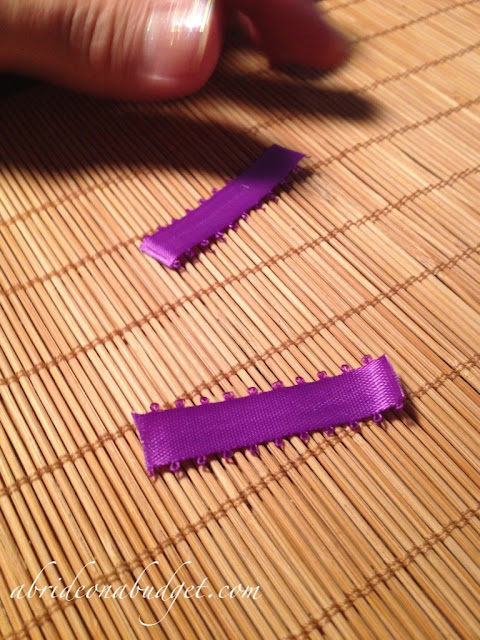
Then cut a second, matching piece.
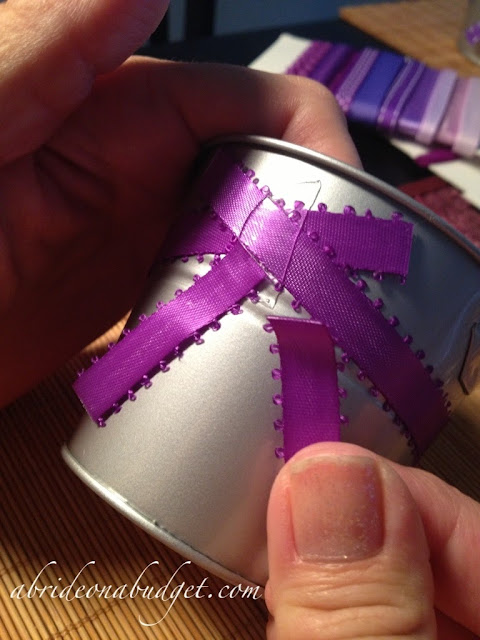
Affix these below the ribbon, using the Glue Dot to hold them on.
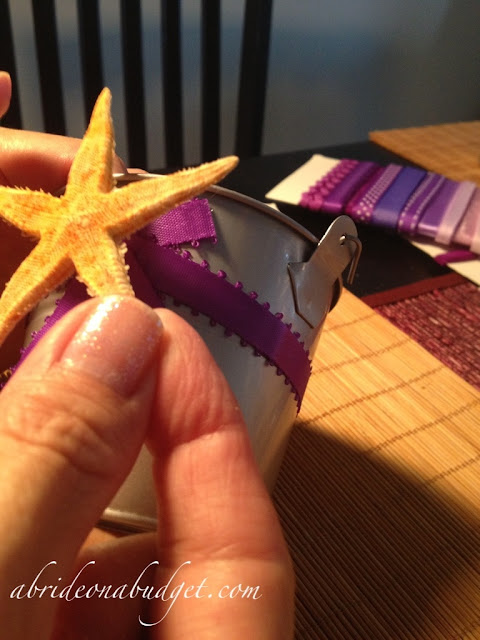
Affix a starfish -- carefully -- on top of the Glue Dot.

Use different ribbon and different sized starfish so the buckets aren't all exactly the same.
And you're done ... almost. You can't give people empty buckets.

That's why I picked out the tux and dress buttermints. Personally, I love buttermints. And these ones are so festive. Two pluses. What you also need to keep in mind, though, is that you can only place wrapped candy inside these buckets, per the advice on Oriental Trading's site. So, although it might be cute to fill them with personalized M&M's, resist the temptation. It's also why you need some sort of "barrier" between the candy and the bucket itself.
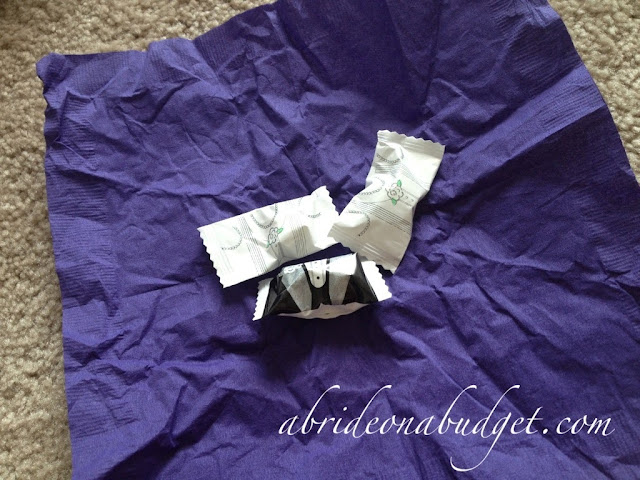
Place three candies inside a purple napkin.

And stuffed it inside the bucket.
Tada! Now your beach candy buckets are done.

My mom made 150 of these and put them in a box. We put a bucket down and added three candies. That was enough leverage to make sure the starfish weren't touching.
The starfish are real ... making them really fragile. If we tried piling one bucket on top of the other, the starfish would most likely break (and since there was about one per bag that came broken, we couldn't take the risk of more breaking). This way, they are all safe.
What we'll do is keep them in the box until the wedding day. Then, I'll ask two very trusted, detail oriented, and careful individuals, to take them from the box, remove the buttermints, add them to a napkin, and restuff the buckets.
The grand total for the supplies (including the Glue Dots but not including the scissors or the Chinese food I bought my mom as a thank you) was $221 for 150. That makes it about $1.50 per favor. Oriental Trading has discount codes and free shipping all the time, so you could actually bring your cost down as well. That's actually half of the favor budget that I allotted (I said the goal was to keep them under $3 a favor). Since we (cough cough, my mom) did the labor ourselves, it definitely kept the cost down. If you look online for a similar favor, it'll cost at least $3.50 to $4 a bucket, so this was a huge savings.
Time consuming? Maybe. But worth it? Absolutely.
BRIDAL BABBLE: Do you think these beach candy buckets are something you could put together?
(PS ... If you're coming to my wedding, please try to forget what these look like so you can be surprised on the day of)

Those are adorable! Stuff like this sometimes makes me wish I had a more traditional wedding :)
ReplyDeleteAah! Those are so cute! Would be great for any beach-themed event!
ReplyDeleteThose are adorable! I am doing some DIY projects for my wedding and OTC has been viewed a ton by me! I want so many things from there! Great review and I love that there are pictures for each step in your DIY post!
ReplyDeleteThese area adorable...and I love your colors, eggplant, lilac and silver are a great trio! I'm excited for your big day after just reading your post! lol
ReplyDeleteThese are beautiful! I love the colors. Never seen glue dots. Going to have to buy some.
ReplyDeleteSo cute! That is a great idea. I'm definitely going to put it in my 'wedding planner' files...
ReplyDeleteCan't wait to see how they look on the tables. I think they will be perfect for your beach-themed wedding.
ReplyDeleteThis is an awesome idea. Just perfect for a beach wedding too.
ReplyDeleteThese are so pretty! Love them
ReplyDeleteSo cute! I gotta come up with a wedding favor!! I have no idea what it's going to be though!
ReplyDeleteThese are cute! You are making these way ahead of time! That's good!
ReplyDeleteAria H.
I can't tell if my comment went thru:
ReplyDeleteThese are cute! You are making them way of ahead of time! That's good!
This is absolutely adorable! Thanks for taking pictures to show us along the steps :)
ReplyDeleteI love DIY! This seems so simple and yet very heartfelt. Love it!
ReplyDeletewhat a cute idea
ReplyDeletewhat a cute idea Laura V
ReplyDeleteGreat idea! I wish I was talented with DIY projects
ReplyDeleteI love me some wedding DIY. my friend is getting married next year and is on a really tight budget. I'll be letting her know about this DIY
ReplyDeleteI may just steal these! We're planning a beach wedding and these would just be the perfect favors!
ReplyDeleteThat's a really cute idea, and didn't look too difficult to do! I'm always on the look out for cute but easy DIY projects because we are on a tight budget for our wedding.
ReplyDeleteYou are seriously so creative!! These are going to be awesome for your wedding!
ReplyDeleteYou are so creative! These are going to look great at your wedding!
ReplyDeleteThis is one of the best blogs I have read.
ReplyDelete